Sunday, April 29, 2012

Week 17 or Braided Handles

Years ago, before I had kids, I did yoga every week. Sometimes even twice! I went so far as to make yoga mat bags to sell at the studio. I even sold a few. I went out and bought material to make more. I cut out parts and finished the edges, did all the simple stuff short of committing to putting together the bags. I think the teacher still has a half dozen that didn't sell before I moved out of town, the studio moved and we fell completely out of touch.

I still have several sets of material that never got sewn up. This week, I was thinking of making one of the many patterns I've bookmarked from my web crawlings. Then life got the better of me and I ended up wracking my brain trying to think how not to make another plain old bag with webbing or matching fabric handles. Or worse yet, another t-shirt bag. Which seem like a cop-out, in addition to not getting rid of any fabric.

The girls are off at a birthday party right now with Dad. As usual, I got tasked with wrapping the present. Instead of reaching for the paper, I reached for the fabric which spills forth from my closet shelves. A pretty, thin, cotton print with pink and blue flowers and green leaves on a white background that barely peeks through them all. I was going for a Japanese look, for the Furoshiki effect. The sellers claim it's eco-friendly, but in my mind that only applies if you're not BUYING MORE STUFF!!! And no way am I shelling out $16+ when I have fabric and a sewing machine with a rolled hem foot. So I took my length of this fabric and cut off a few inches from one side to make it a square. Then I hemmed it and wrapped up the present.

So I'm here, alone in the house at last. You're thinking I get right to business making my bag. Ha! I grab a slice of chocolate chip sour cream cake (trade for an earlier bag) and watch a few minutes of a Sunday afternoon PBS cooking show. Some guy making meringue tubes with 5 raspberries just so and a spoonful of raspberry sorbet. They take like 40 hours from start to finish. I'll file that one away for when I live in the dessert and the kids are off in college.

I know I want to use the scrap of flowered furoshiki to make the handle. It's so thin that it needs help to be up to the task. I debate doubling it, adding a layer of plain webbing in the middle. Nah. I go for a braid, since it's just wide enough for three strips that will go through my 1" bias tape maker and just long enough for cutting in half and making two handles.

Then I look at the yoga mat bag bits. Brown corduroy, tan denim, maroon with elephants. At last I spy the black windowpane check. It's rather thin and probably would not have made a good mat bag, but it was a present and you don't just throw away fabric. Well, its moment in the sun has arrived. The black is a nice foil for the spring-like handles. I was really happy to find that the edges were all finished, so I didn't have to sew French seams or break out the borrowed serger again. Attached to it were a rectangle originally destined to become a water bottle pocket, and a black circle that was to be the bottom of the mat bag. I put the circle back on the shelf and decided to add a little inner pocket to an otherwise standard grocery bag. If you're not picky about wrinkles, you can turn it all inside out and stuff the bag into the pocket. I would include a picture of that, but I just spent 10 minutes ironing the edge into place and I'm not about to waste that time.

All in all, I'm happy with the way it all turned out. The only thing I don't like is that the windowpanes are a little wider than they are tall. Which is only because I used it with the selvedges running around the bag instead of top to bottom. If that doesn't bother you, it's all yours. The finished bag is 10" x 5" x 13" high. A little smaller than my other grocery bags, but still large enough to hold more than Market Basket baggers ever put in a plastic bag. And as Edward Humes, author of Garbology, said in his interview with Terry Gross, in response to the question "paper or plastic?": ""The correct answer is neither, if you want to have the best solution." This one is light and thin enough to stuff in your backpack or large purse.

Saturday, April 21, 2012

Week 16 or More t-shirt bags

I hope this doesn't become the "What Crazy Shirts Did We Get This Week" blog. My husband works as a computer programmer. Clearly his co-workers' computer skills have not expanded to include photoshop or any sort of graphic design. This shirt was what the team had made for themselves. Sight unseen, my husband thought it would be fun if we all had one! Now we each have a shopping bag.

Here's my original t-shirt bag post. And here's the second version. Let's hope I don't have to resort to this again.

Saturday, April 14, 2012

Week 15 or Aunt Edna's Couch


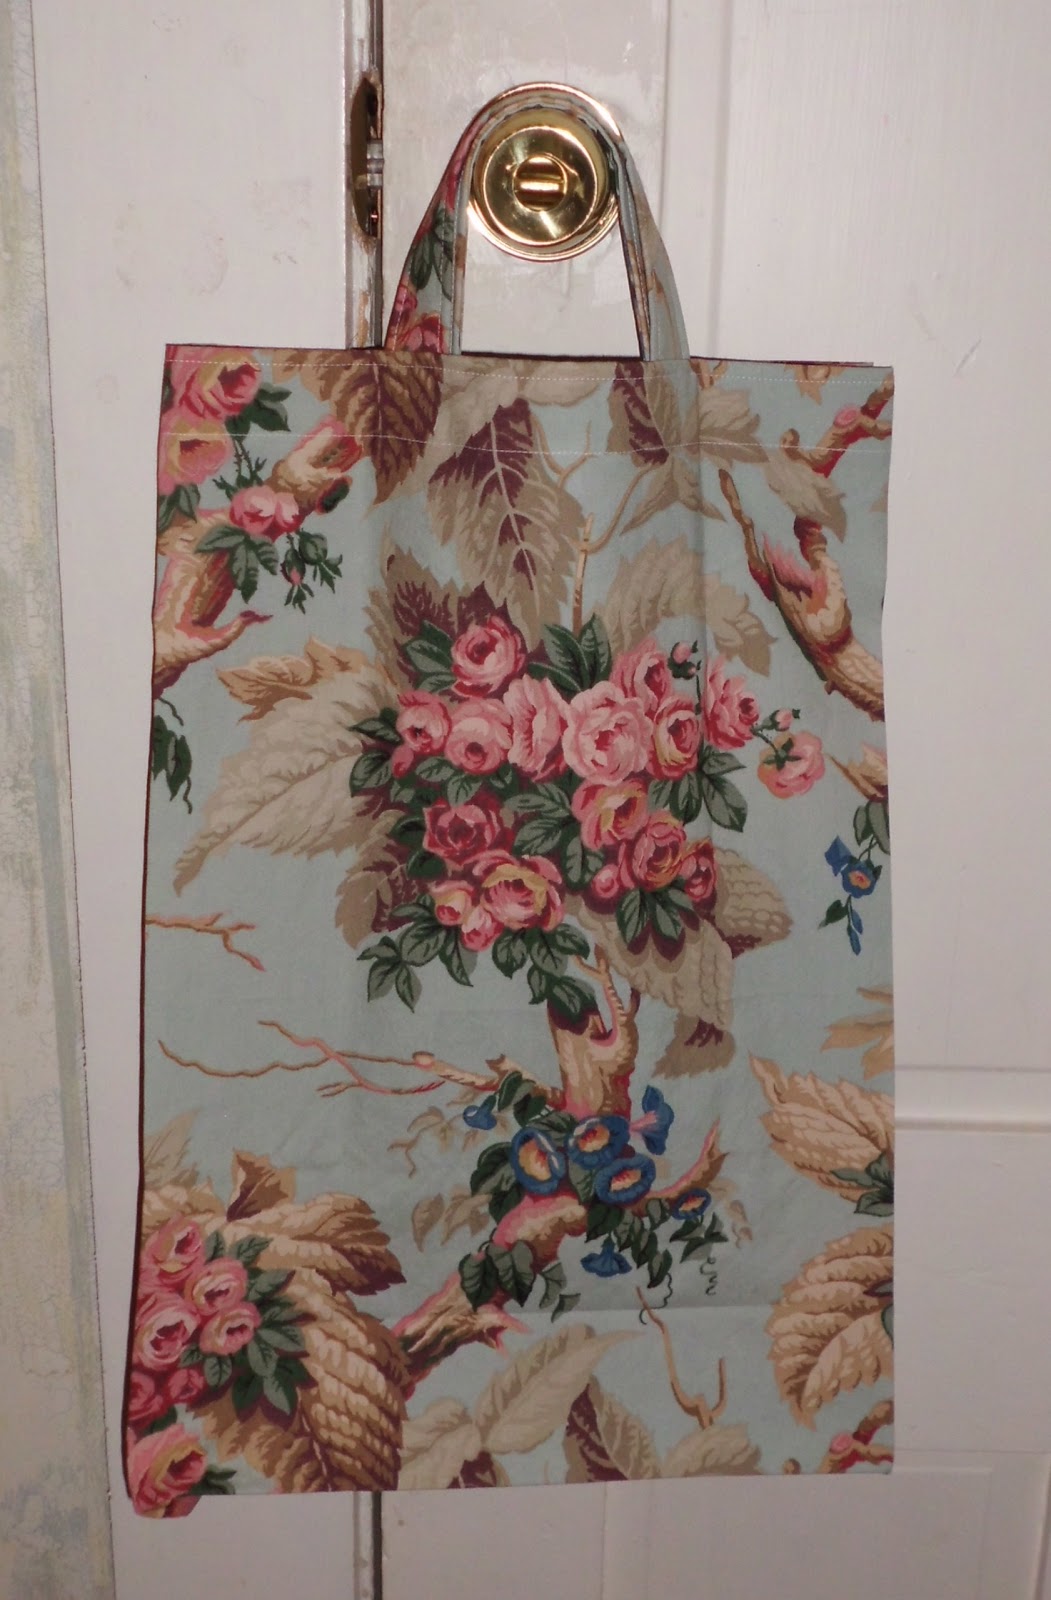
As promised, a bag that looks like it would blend right in with your Aunt Edna's couch. No need to all shout at once, there are a dozen more bags' worth of this fabric waiting for a purpose.
It's a standard grocery bag, with thicker handles than the last one and a flatter profile. I like the way the roses lined up nicely in the middle of the bag. That was completely accidental and made me very happy when I noticed it. If you look closely, you'll see that it worked out on both sides!

Happy Orthodox Easter to one and all. I spent a lot of time making bread for that this week and last. We have a tradition of sending a loaf of it to my mother in law and godmother in law. Normally I'll find or create a box to mail it in, but I didn't have time this year. Luckily, I did have some bubble wrap, the two lovely bags from last week, and a big roll of plain paper. They should arrive today, just in time.

Coming up is school vacation week, which isn't nearly as much fun when you're a parent, but I'll get to see some other parents I haven't seen in a while, so that will be nice. If the kids cooperate. Which they do from time to time.

Friday, April 06, 2012

Week 14 or the Easter bags

About a year ago, I got a bunch of material at a yard sale. A home decorator was clearing out half her house and was selling off bolt ends. I got some red ticking that got made into a Christmas tree skirt this past December, to replace the length of burlap that had been doing the job. And some black ticking. About 7 yards of robin's egg blue woodland floral print cotton that I think should have been named Aunt Edna's Couch. Bonus: it was labeled as 3 yards, but was actually closer to 7! And this lovely pastel green plaid that just screams Easter to me.

It matches the nasty wallpaper the
former owners used in my sewing room.


Without further ado, I give you two basic grocery bags. I didn't measure the corners for the box bottoms, so the bags turned out a little narrower and deeper than I'd wanted. The material is light enough to take anywhere and strong enough to carry 2 gallons of milk. There's enough material left to make three more, but they'll have to have webbing handles.

Monday, March 26, 2012

Week 13 or The Broken Towel Bar

Towel bar and 26"x37" fabric

Once again, inspiration strikes from the materials on hand. We had a cheap towel bar that had fallen down one time too many. So I bought a new one and had to find something to do with the old one. The brackets got tossed and the bar got cut in two and became the handles for this bag.
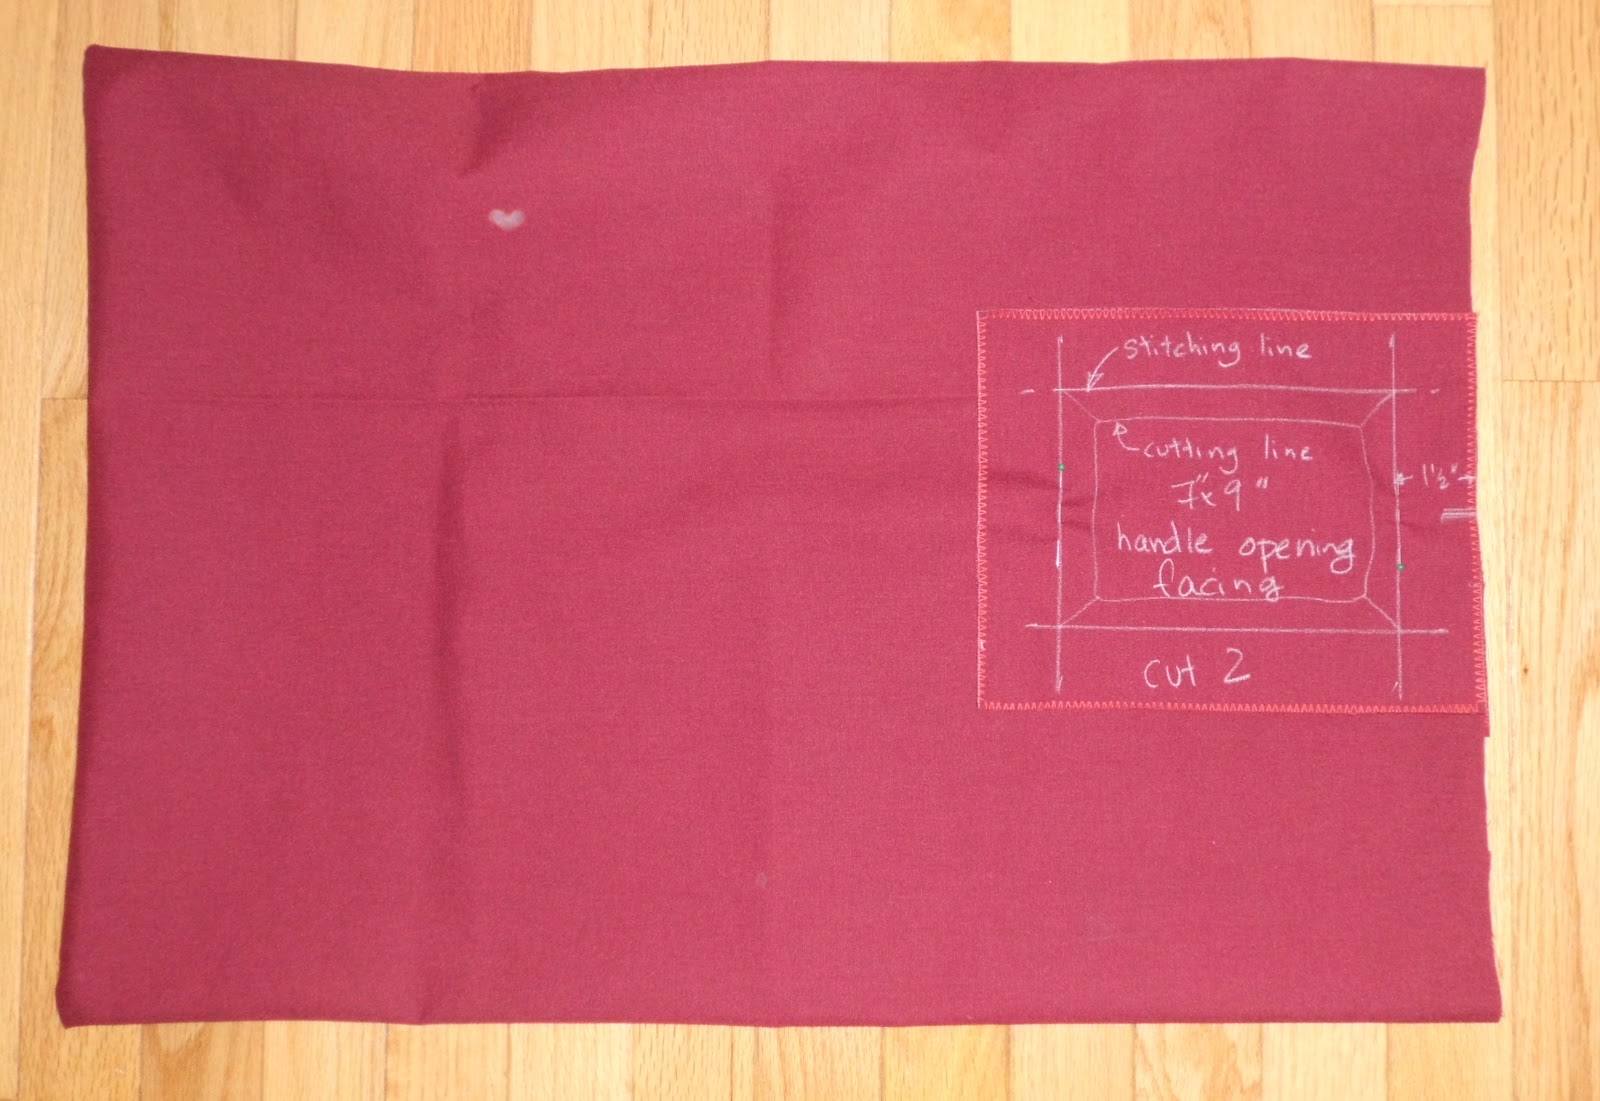
Handle opening facings
I aimed for a 12"x 6"x 18" tall bag. I cut one large rectangle, 26"x 37", and two small rectangles, 7"x 9", to face the handle opening. Once I actually put the bag together, I realized they should have been 9"x the width of the bag (12" in my case). The towel bar was about 19" long, so I cut it in half, getting two 9.5" pieces. My bar was wood, which made it easy to cut, but you could use a metal bar too. Or you could go crazy and buy a dowel. I do suggest looking around the house for something first, though. I've got my eye on the girls' Tinker Toys and sparkly magic wands. You might have a pointer, broom handle, wooden spoon... Just look.

Welcome back. What did you find?
Fold the body in two and stitch around 2 sides 
I figured I'd need a hole about 4" wide and 3" deep to fit my hand and the bar. Doubling the 3" to get 6", I drew a 4"x6" rectangle 1.5" from the edges of the facing. That gave me my stitching line. If your bar or hand is much larger or smaller, you  may want to adjust that measurement. Since you'll be using a 9"x12" rectangle, draw the 4"x 6" one in the center of that, with the 4" end along the LONG edge. Put a little mark in the middle of the long edge so you can line it up with the middle of the bag body later. (I haven't done that yet, but you'll see the mark later.)

Now it's time to start sewing. Fold the large piece of material, the body of the bag, in half with the right (pretty) sides together. You'll have a 26"x 18.5" rectangle. Sew down the long edge and along the short edge to the fold. Zigzag along the raw edges to keep them from fraying.
Pin the facing to the center of the top edge
Turn the bag right side out. Mark the midpoints of the open edges. Finish (zigzag stitch over) one long edge and the two short ends of the facing pieces. Pin the facing pieces to the open edges. Line up the unfinished edge of the facing with the upper edge of the bag, making sure the marks line up, too. All four marks should be in the same place so your handle openings will line up. Pin it all in place. Sew along the stitching line.


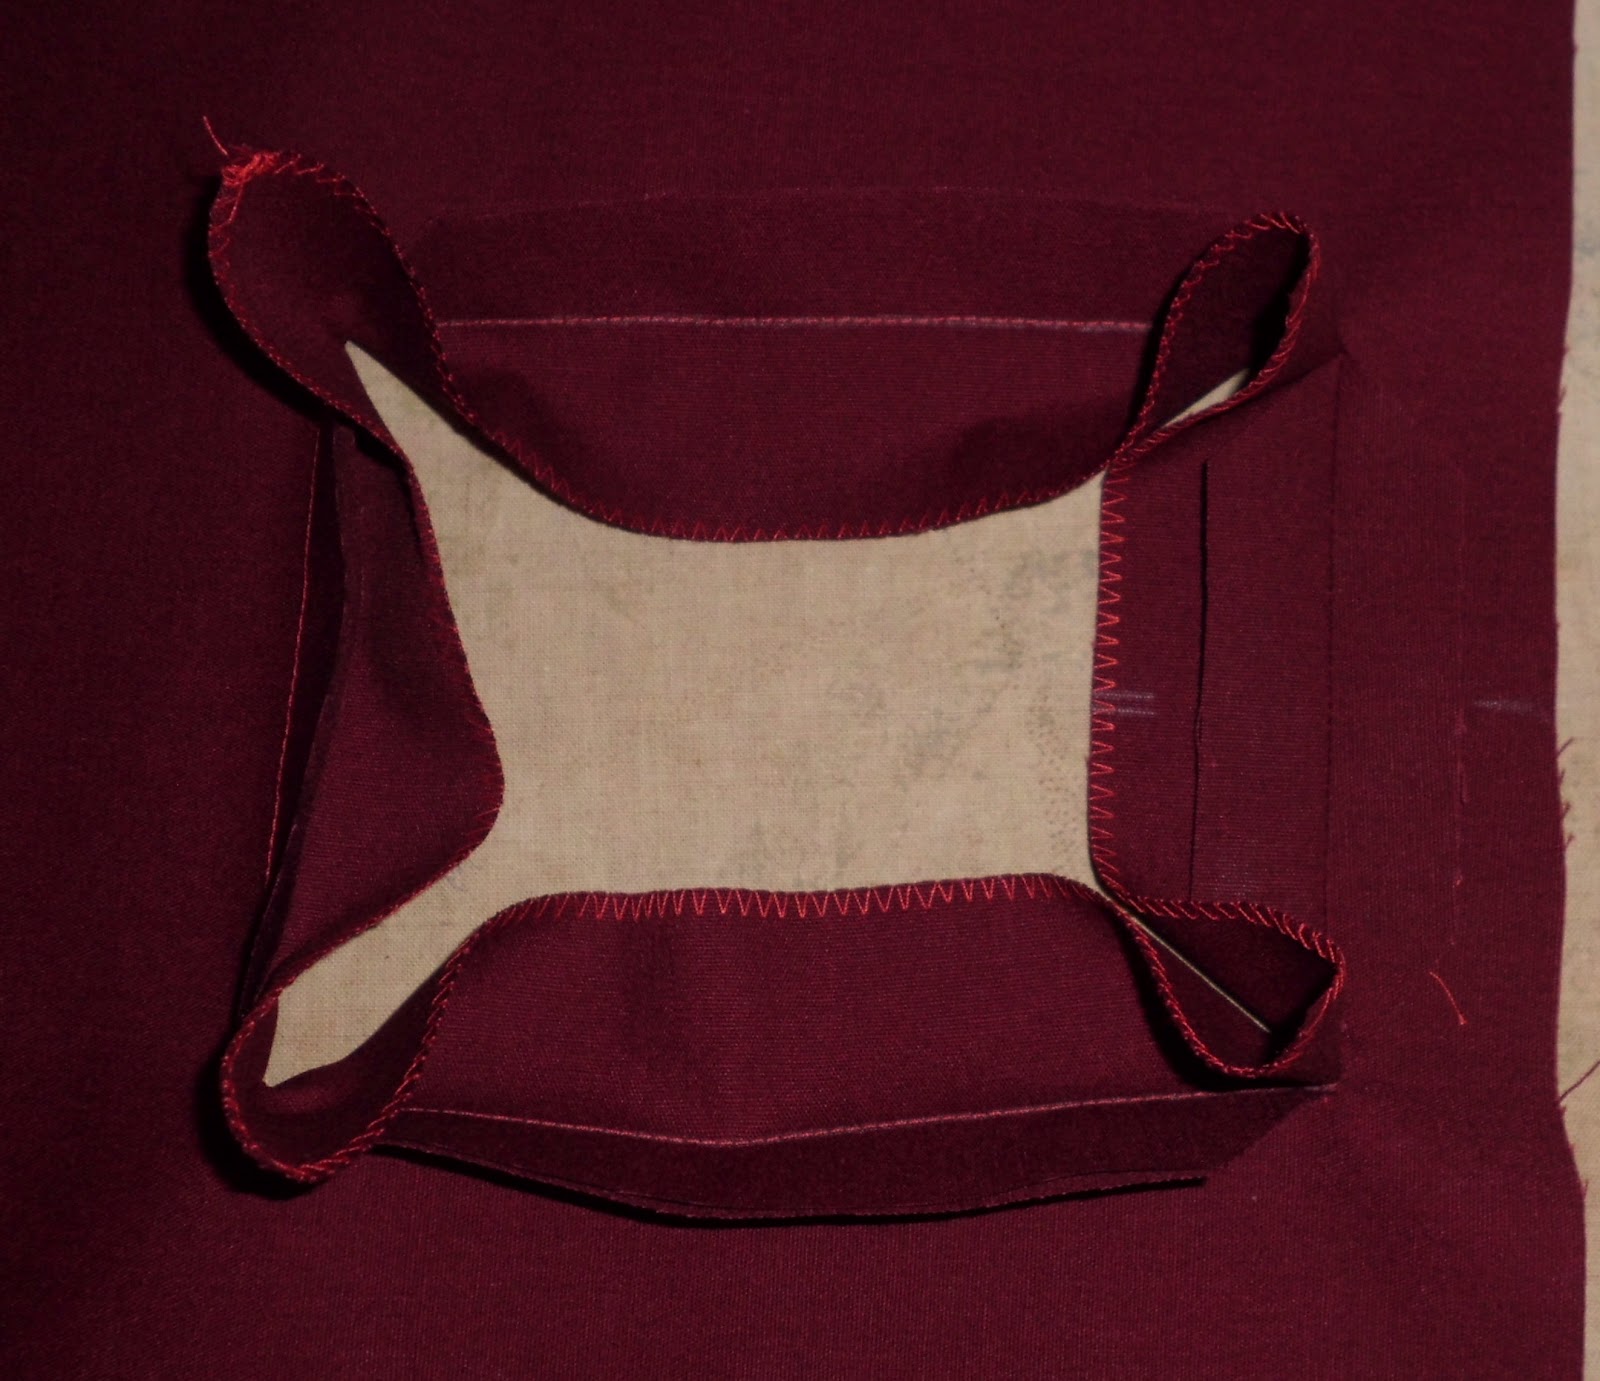
Cut the handle opening
Cut out the inside of the rectangle you just sewed. Leave about 1/2" of fabric. Snip right into the corners so they'll be nice and sharp in the end.

Pull the facing through and press it
Turn the bag inside out and pull the facing to the inside of the bag. Dust off your iron and press the seams open one at a time. Then pull the whole facing nice and tight and press it all again.

Topstitch around the opening so it stays nice and neat forever and ever. That just means sew around the opening, really close, like 1/8"close, from the edge of the opening.
Topstitching


Box corner
Finish (zigzag stitch) the top edge, being sure to catch the edge of the facing as well. You could turn a hem here, but I got lazy.

Make the bottom box corners that will give your bag some dimension. I was aiming for 6", but I didn't measure and they ended up being a little bigger, making the faces of the bag a little under 12" wide. Whatever you do, make sure both sides are the same. Also make sure you line up your bottom seam with the side seam on one side and the side fold on the other. That way you'll know everything's square. See how nicely perpendicular the seams are in this picture?

We're getting close to the end and every stitch from here on out will show on the outside. Fold the top edge of the bag towards the inside. Line up the two short edges of the handle opening and pin them together so nothing moves. Stick your handle in its' final position and pin around it. You want to stitch a channel that's exactly as wide as you need. Too small and you won't be able to get the handle back in. Too big and it will fall out when you go to pick up the bag. Take the handle out and sew where you've marked. Sew all the way from one opening to the next. Do this on both side of the opening. Then sew all the way around, on the level of the topstitching around the opening. That helps the facing keep from flapping open and falling out of the bag. Lastly, find the corners of the top of the bag. They should line up with the box corners you made at the bottom. With the handle removed, press those folds nice and crisply. Then sew right on them, from the top edge to the lower row of topstitching. That will help keep the handle from sliding out of position and dumping your carton of eggs on the sidewalk. It's not right up against the ends of the handles, so they can still be removed for washing (or repainting!). Insert the handles and go shopping!


Friday, March 23, 2012

Week 12


The second bag for Martha, this time 1939.


This one is my second iteration of the red and white 1475 bag from a few weeks ago. The sail is much softer and the top material is much stiffer, so this one does not stand up on its' own. It's probably also not as water-resistant, but it does have some spiffy topstitching along the upper edge.

 I also figured out how to get the rope through the grommets more easily. You put tape on either side of where you want to cut the rope. Then you melt the raw end so it doesn't fray. I had been leaving too long of space between the tapes.

At the boat shop, where I got slightly thinner and more colorful rope for next time, they have an awesome heat cutter. There's a heated flat blade and you just pull the rope down on top of it and it melts right through like a hot knife through butter. They use a wide piece of tape and just cut straight through rope and tape in one shot. Some day... for making butter slices when I open a fancy B&B.

Wednesday, March 14, 2012

Week 11

Martha gave me two sails at the start of last summer. I said I'd make her a bag as a birthday present. This one was her special favorite sail, so I didn't want to start hacking away at it without a little experience first. I made another bag from her "scrap" sail a couple of weeks ago. Then I realized how gigantic this logo was. Not so big when it's all the way across the harbor, but quite large when you translate it into a bag. So I went with a different design. The final dimensions of the bag are 18" wide, 23" tall and 9" deep. You can fit at least one sail in it and perhaps a small boat, too.
There are a couple of seams on the back from the sail. I imitated the original stitching style of the sail in the topstitching. Upholstery thread to match the durability of the fabric. More grommets and seaworthy rope for the handles. I considered using light blue for the side and bottom panels, but didn't have anything that matched well and was wide enough, so I just went with a monochrome look.

Sunday, March 04, 2012

Week 10

The half-bushel bag. I love picking apples with the kids. Heck, I just love picking apples. It's nice to be out in the fresh air in the fall. The apples taste better than you'll ever get any other time or place. And you know exactly where your food is coming from.

The one thing I don't like about apple picking is the bags. In the case of our closest orchard, they're plastic, they come from China and the handle makes it nearly impossible to put anything but apples in them. It's fine for carrying a heavy load of apples, but you can't put anything big in the bag.


So I made one out of some flag material I picked up on Freecycle and the rope and grommets I've been using a lot of lately. I wanted to keep the handles in the same place and orientation, but make it possible to swing them out of the way to fill the bag. Sewing flat straps in place would mean the handles would always be a little bit in the way. Grommets and rope allow the handles to pivot out of the way. I measured how much rope I'd need to go from grommet to grommet and then added enough to tie the knots that secure the ends. A little fire, a pair of pliers and some heavy pulling and we were all done.


Saturday, February 25, 2012

Week 9

Another short post because of a crazy week. The kids were out on vacation this week, so we were out of town for 5 days.

The trapeze show went great. I did crash into the catcher on my first swing, but I caught both my tricks on my next 2 tries. Thanks to all who came out!

Especially to Amy, who gave me a big bag of big shirts to transform into bags for her school fundraiser. They're leftovers from printings gone by, so many of them are gigantic. Almost ridiculous for shopping bags. But then we got a couple of bags with take-out while we were away, so I used those to size these. It's kinda poetic that a XXXL shirt has been transformed into something to carry a pizza or a box of donuts. The red bag actually has 2 clementine crates in it and the blue bag has a 12" pizza box inside.

So while these might not net enough to send a kid to Europe, they're not completely useless.

Here's my original post on the t-shirt bag concept, with notes on making my version. And here's the tutorial I based it on.

Saturday, February 18, 2012

Week 8

Very short post this week. Must go shower before performing in a trapeze show tonight. Go TSNY!

I spent a fair chunk of sewing time making a horse costume for that. Just a tail, an embellished t-shirt and a headband with ears, but the little things always take more time than you'd expect. I wasted some sewing energy making a pair Colonial-era aprons and caps for a 3rd grade dramatic reading of the Declaration of Independence which ended up not needing costumes.


So today I dug into the actual sail for the second time. The first time was for a gift bag for a 5 year old. I grabbed the "5" off the sail and made a little drawstring shoulder bag. This time I went for a big round tote with a cinch top. I think you could fit a whole sail in that thing. Or a load of laundry.

Saturday, February 11, 2012

Week 7

Saturday snuck up on me this week. I was busy with other things and thought I didn't have time, but then a couple of 2-hour holes appeared in Friday's schedule and I took advantage of them to make my bag of the week. Good friends and good planning made this week's bag possible.

I'm calling it my Quack Bag. That's Quack. He's a character from Peep and the Big Wide World, which if you ask me is about the best little kids (science) show out there. Quack is a duck. He's blue. He wears a sailor hat. There's a beaver, named Beaver Boy. He has trouble remembering names. So he calls Quack "Blue Sailor" because of his sailor hat.

This bag is made of remnants from the local sail shop. And it's blue.

Pretty basic construction this week. Four short blue strips sewn together to make the two faces of the bag. One long very dark blue strip to go down the sides and across the bottom. One long skinny white strip to go around the inside of the top edge. Four giant grommets and four scraps to reinforce the holes. Four feet of thick rope for the handles.


I sewed the short strips together in pairs and topstitched the seam down because the material is so stiff that seam would never lie flat on its own. I sewed the long dark strip around 3 sides of the faces. I sewed the skinny strip inside the top edge. Then I sewed the ends of it together and topstitched along both edges. Next time I might put the white strip on the outside of the bag, as more of a nod to Quack's hat.


Who says a bag can't smile?

Next came holes for the grommets and hammering the grommets in place. Nothing like a good session with a hammer to work out your frustrations! I cut the rope to length and melted the ends to keep them tidy and help them get through the holes. Four knots and I was done.

No pictures of the process this week because I was too focused on just getting the thing made. At some point I need to decide if this is going to be a tutorial blog of a voyage of discovery blog. If you have any thoughts, post them below.

Saturday, February 04, 2012

Week 6


Funny, I'm busier than ever this week, but I still managed to make 4 bags ahead of schedule. A teacher friend was looking for items to auction off so her inner-city students can take a trip to Europe. I offered the pants bags from Weeks 1 & 2. But they're a fair amount of work and she mentioned that she had school t-shirts that maybe I could use. 

The idea of a t-shirt bag has been floating around in my head for years, but I generally give my shirts to Goodwill, so it never got out of the idea phase. I found this tutorial for a no-sew t-shirt bag, but I have a sewing machine, so why not sew it and eliminate the hole at the bottom?

Using a standard-issue plastic grocery bag as my model, I cut off the arms and neck to make handles. I added a dab of Fray Check to keep the shoulder seams from unraveling. I cut slits in the handles and added a loop tag to the top edge. (It's even easier if you cut another slit at the top edge instead of sewing in a loop.) Why? Because I hate the exasperated looks the grocery store baggers wear when they have to hold my reusable bag open with one hand and stuff it to the gills with the other. With the slits, it can be propped up on the metal racks they use for the plastic bags. 


After a couple of trials, I figured out how to make the bottom seam most easily and in such a way that stuff wouldn't get lost in the pleats so easily. You turn the bag inside out and just fold over the edges and sew across the bottom. I hate a bag that drags on the ground, so I took a few inches off the bottom. It also allowed me to cut off the bulk of the bottom hem so my bag would sit nicely while I set it down to get my keys out to open the front door, with the added benefit of making the exasperated bagger's job a little easier by helping the cereal boxes stand upright.


So, in about 5 minutes, I can whip these puppies out for fundraisers of all types. As one teacher put it "You win the award for the best use of a ... field day shirt!" School pride, recycling, and not having to wear a dull, ill-fitting shirt. Win, win and win!

Saturday, January 28, 2012

Week 5

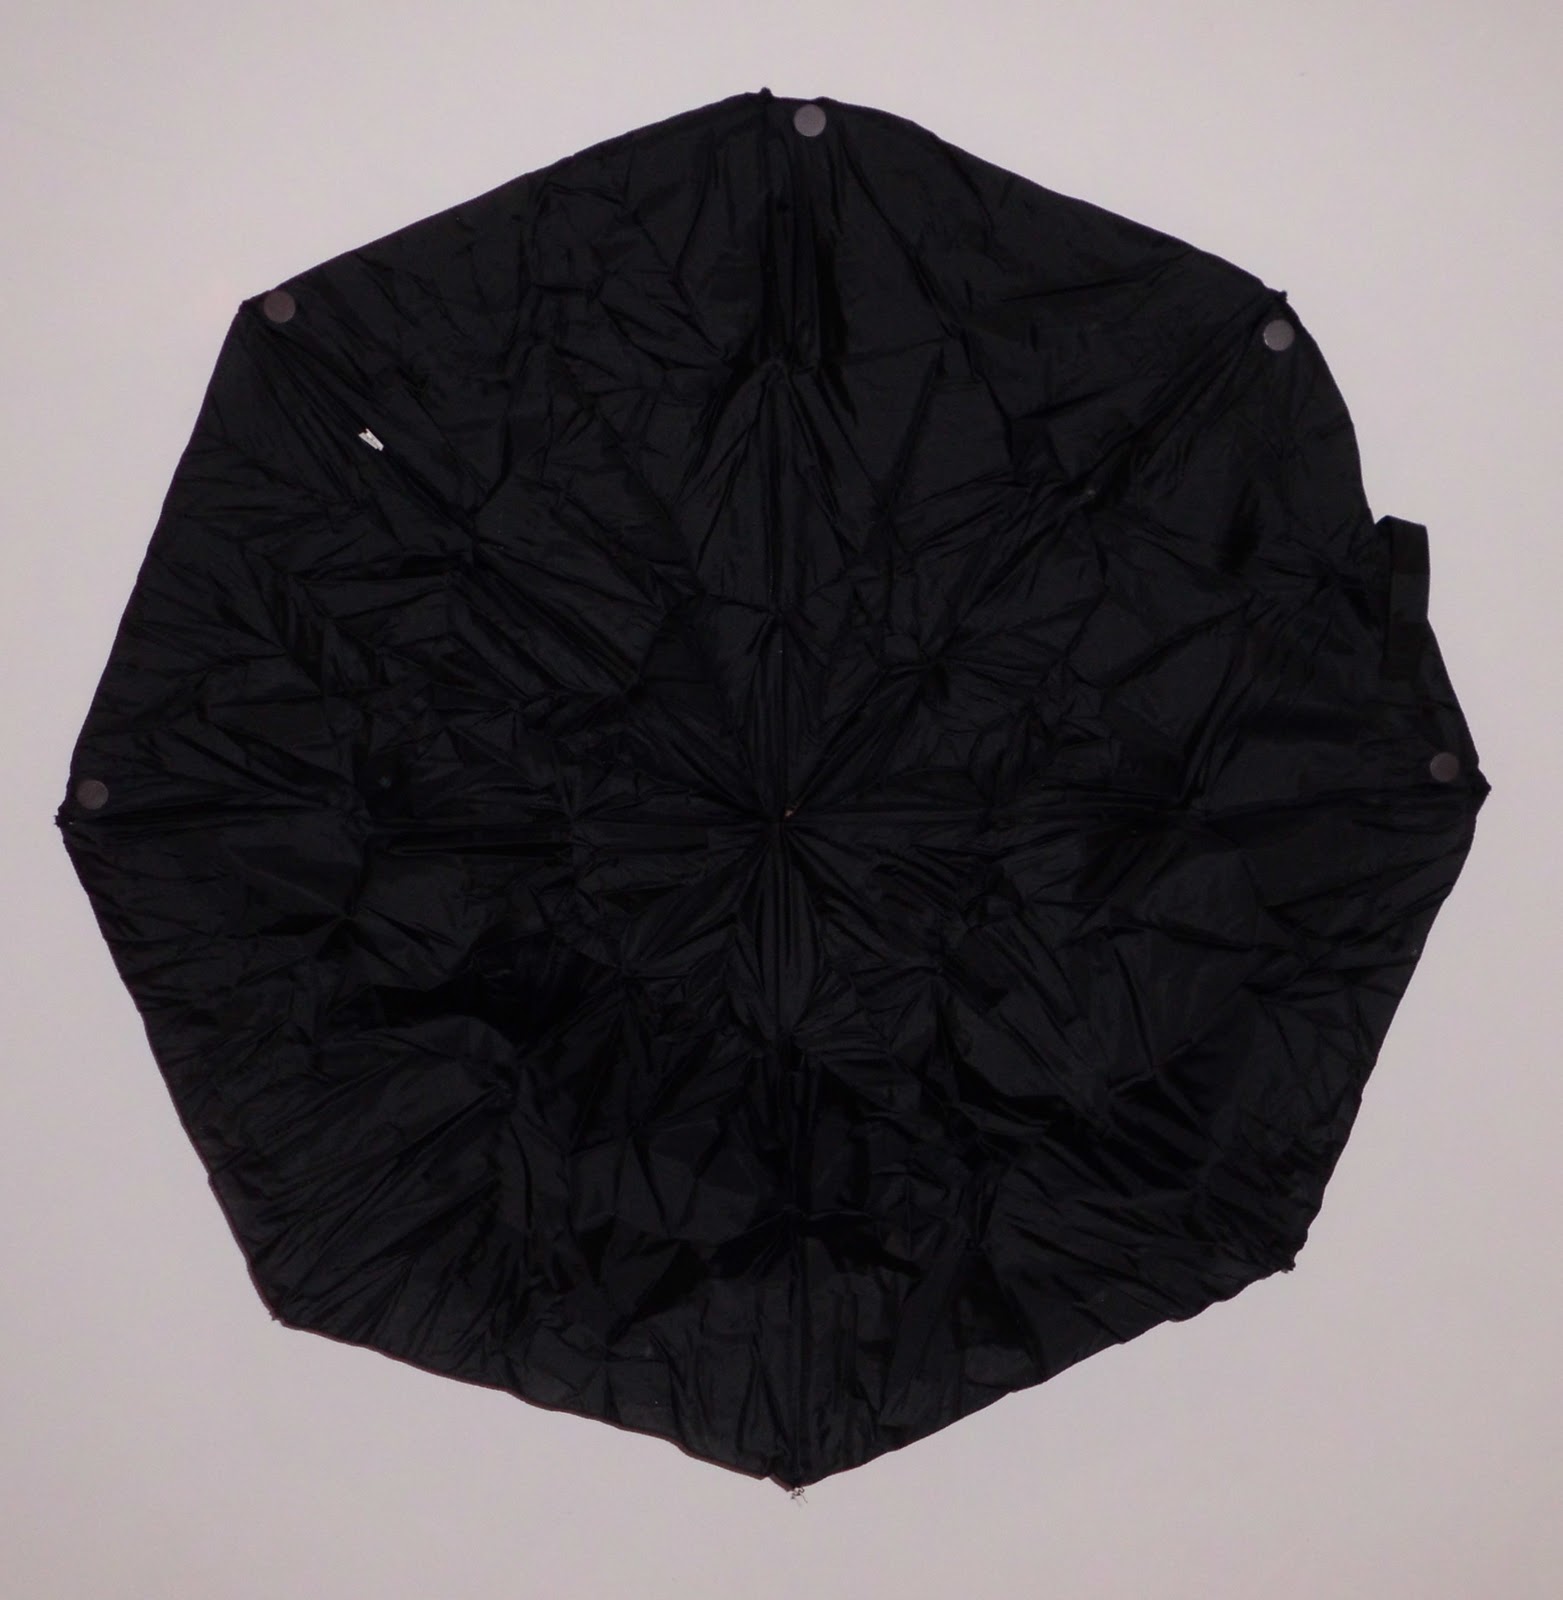
I've been collecting broken umbrellas for different reasons. At first, I wanted the frames to make little greenhouses for the container garden on my sidewalk. Then I had to find something to do with the fabric, so I made a bunch of umbrella skirts for my daughters and myself. Then I thought I'd make a bag, but I wasn't quite sure how to do it. So I just made it up as I went along.

First you cut the fabric off the frame. I used a seam ripper because you can stick it in the little loops of thread and cut them without touching the fabric.

Then you cut the fabric away from the top hub. This leaves a little hole, which I had been wracking my brain trying to figure out how to close it. At this point, it probably would have been a good idea to iron the fabric, but I left that for the final step.

Before going any further, I reinforced the seams from the outer edge in to the last snipped attachment point. The sewing unravels very quickly, but I realized I might need to open up the seams to make the bottom work. It ended up being a convenient place marker later on.

I decided to use half of the sections to make inner pockets. For this umbrella, that meant 2 inner pockets. If your umbrella has only 6 sections, you'd could leave 4 sections for the outside and get one pocket or have just one flappy pocket and 2 inner pockets. I wanted to keep the closing tab to be able to pack the bag up, so I made sure to leave that section as an "outer" piece. I folded the fabric in half along seam lines and just sewed the two outermost quadrants together along the seam line, down to the same point I stopped reinforcing.

Then I lined up the outermost corners with the opposite new seams and sewed along that line to the same point. If you look at the open end of the 8-panel bag, you can make a square with the four outer panels and a four-layer diagonal. 3 pockets for the price of 2!

The trickiest part was figuring out how to close off the bottom. I ended up making an X along the two diagonals of that square. I turned the bag inside out with the pocket diagonal folded in half. I marked a line perpendicular to the outer edge where I wanted the bottom to be. I chose the end of the reinforcement sewing again, but you could put it anywhere. I pinned across the stopping point and turned the bag right side out to check that I had the correct spot. Then I sewed along the line. Then I did the other side.


Next, I turned the bag inside out at the center of the pocket diagonal and basted that shut.  I noticed that the bottom corners I had just sewn weren't anywhere near each other, so I took out the center of the seam, pulled them into place and sewed it again.


I couldn't find any narrow black strapping, like you'd find on a bike helmet, so I used some leftover blue satin ribbon. I folded that in half end to end, sewed the edges together then cut it in two. I placed the handles so the top edges make an X when you pick the bag up.

You can still fold it up and throw it in your bag like the compact umbrella it once was, only now your wallet won't get wet. I'm not sure how practical it is for carrying large amounts of stuff, but it was fun to figure out how to make it and I like the way it looks.

Saturday, January 21, 2012

Weeks 3 & 4

I'm getting ahead of myself. Once again, I have taken one garment and made 2 bags. This week, it's a button-down shirt.

The first bag is a pure recycle, nothing added but thread. A model I've made before. I like to think it's getting better each time. Actually the first one was really quite good, the next two were way too big and now it's good again.

The body of the bag is made from the body of the shirt. The button placket has been sewn shut, but the chest pocket remains. I used some scraps to make handles.

The finishing touch, a stroke of genius if I do say so myself, is to use a cuff to make a dual function closure. You can roll up the bag and use the cuff to keep it small and tidy when not in use. Or you can use the cuff to keep the top closed and stuff from falling out when it's full. Like two baguettes.


The second bag has some sail fabric added. As I mentioned before, I picked up a pants-bag full of scraps from a local sail maker. The dark blue goes with the plaid, so I used one strip for the sides and bottom and another for a facing strip at the top.

The front and back of the bag are cut from the sleeves of the shirt. I've made bags from just sleeves, but they're always a bit too small to be really useful. (Apologies to those of you with kids in the Thomas phase.)

One handle comes from the collar and the other is made from another scrap. I kept the button & buttonhole on the collar and added one of each on the other side of the bag so it could be closed up a bit. This bag does not have a handy dandy folding mechanism, but I like it just the same.

Monday, January 16, 2012

Weeks 1 & 2


This project started out two weeks behind. Story of my life, these days. So I did a 2-from-1 project. The classic jeans bag, top and bottom.

Before:

Actually, they did start out as a complete pair of jeans. You can see the ragged edge of the hole at the bottom of the top half, left leg. I've already unraveled the seams, which goes quickly once you find the correct end of the thread to pull.


After:


The waist bag has handles made from cotton webbing meant to be used for the seats of Shaker-style chairs. The Shaker Workshop, in Arlington, MA, sells short lengths of webbing at a discount. It's not enough to make a chair, but it's just right for the straps on yoga mat bags, which I used to make in quantity.


The leg bag's handles are a composite of pink camouflage and purple swirls.