The kids started back at school a few weeks ago. Lego League starts up again this week. For the past two years, I've coached a series of Junior FIRST Lego League teams at the school. This year my older one has aged out of the Junior League and is moving up to the competitive stage. We lost our competitive Destination Imagination teams due to kids graduating and a coach's kids moving out of the school. (Boo on many different levels, but she's still a dear friend, and none of the boo's are directed at her.) So the competitive pressure is on our shoulders. And my daughter only wants to do it so she can go to a championship far away. Our school may be small and poor, but somehow we manage to send a team to the DI national championships on a regular basis. In the 4 years we've been there, three years have seen a team go to Nationals. If only for the financial health of the donor community, I hope we don't go farther than local competition.
So this year I will be coaching two teams, with my kids, instead of four teams, only one of which has my kids on it. A couple of months ago I made a Lego box that we use at home. It seems to be holding up pretty well. When I made that one, I cut out material for a second one. I made the center panel out of clear plastic with Kevlar threads. At some point I forgot which pieces went to what and used one of the plain bits for some other project. How odd that the material was perfectly rectangular and 21" wide! Just what I needed at the time! So one side is cut from stiffer sail fabric, the other from softer sail fabric. I'm sure the kids will be so distraught by the discrepancy that they refuse to play.
Knowing all the pains I took to add the velcro and the handles last time, I sewed them to the components before assembling the box. Way easier. With the extremely stiff center panel, I would have been cursing like a sailor sewing them on this time. Never mind that I then sewed one of the handles into another seam. It came out easily enough with no visible damage.
I had just enough of the Kevlar material to make the lid, so I did. All in one day. OK, maybe two or three days. I had just enough plastic sign material to stiffen two sides, so I did. I may have to wait until after the elections to grab another sign and stiffen the other panels. Then again, if everything works well without it, I may not bother. Right now, it's holding together well enough, but it's definitely not as structured, stackable or tidy as the other box. I also like the idea of having a semi-clear box. Unless I can find two clear plastic panels, I would lose that feature.
Oh, crap. I just checked out the Lego League registration information, and it looks like I'll be asking the PTO for a lot more money than I had intended. Oh well, we're saving a lot by not having the DI teams. And the city wants to encourage STEM (Science, Technology, Engineering and Math) programs, and has a pot of money for that.
My attempt to whittle down my fabric stash by making a bag a week. Sign on for a bag of your own. Or follow along to make your own.
Showing posts with label sail cloth. Show all posts
Sunday, September 23, 2012
Saturday, August 25, 2012
Week 34 or Chalkboards and sails
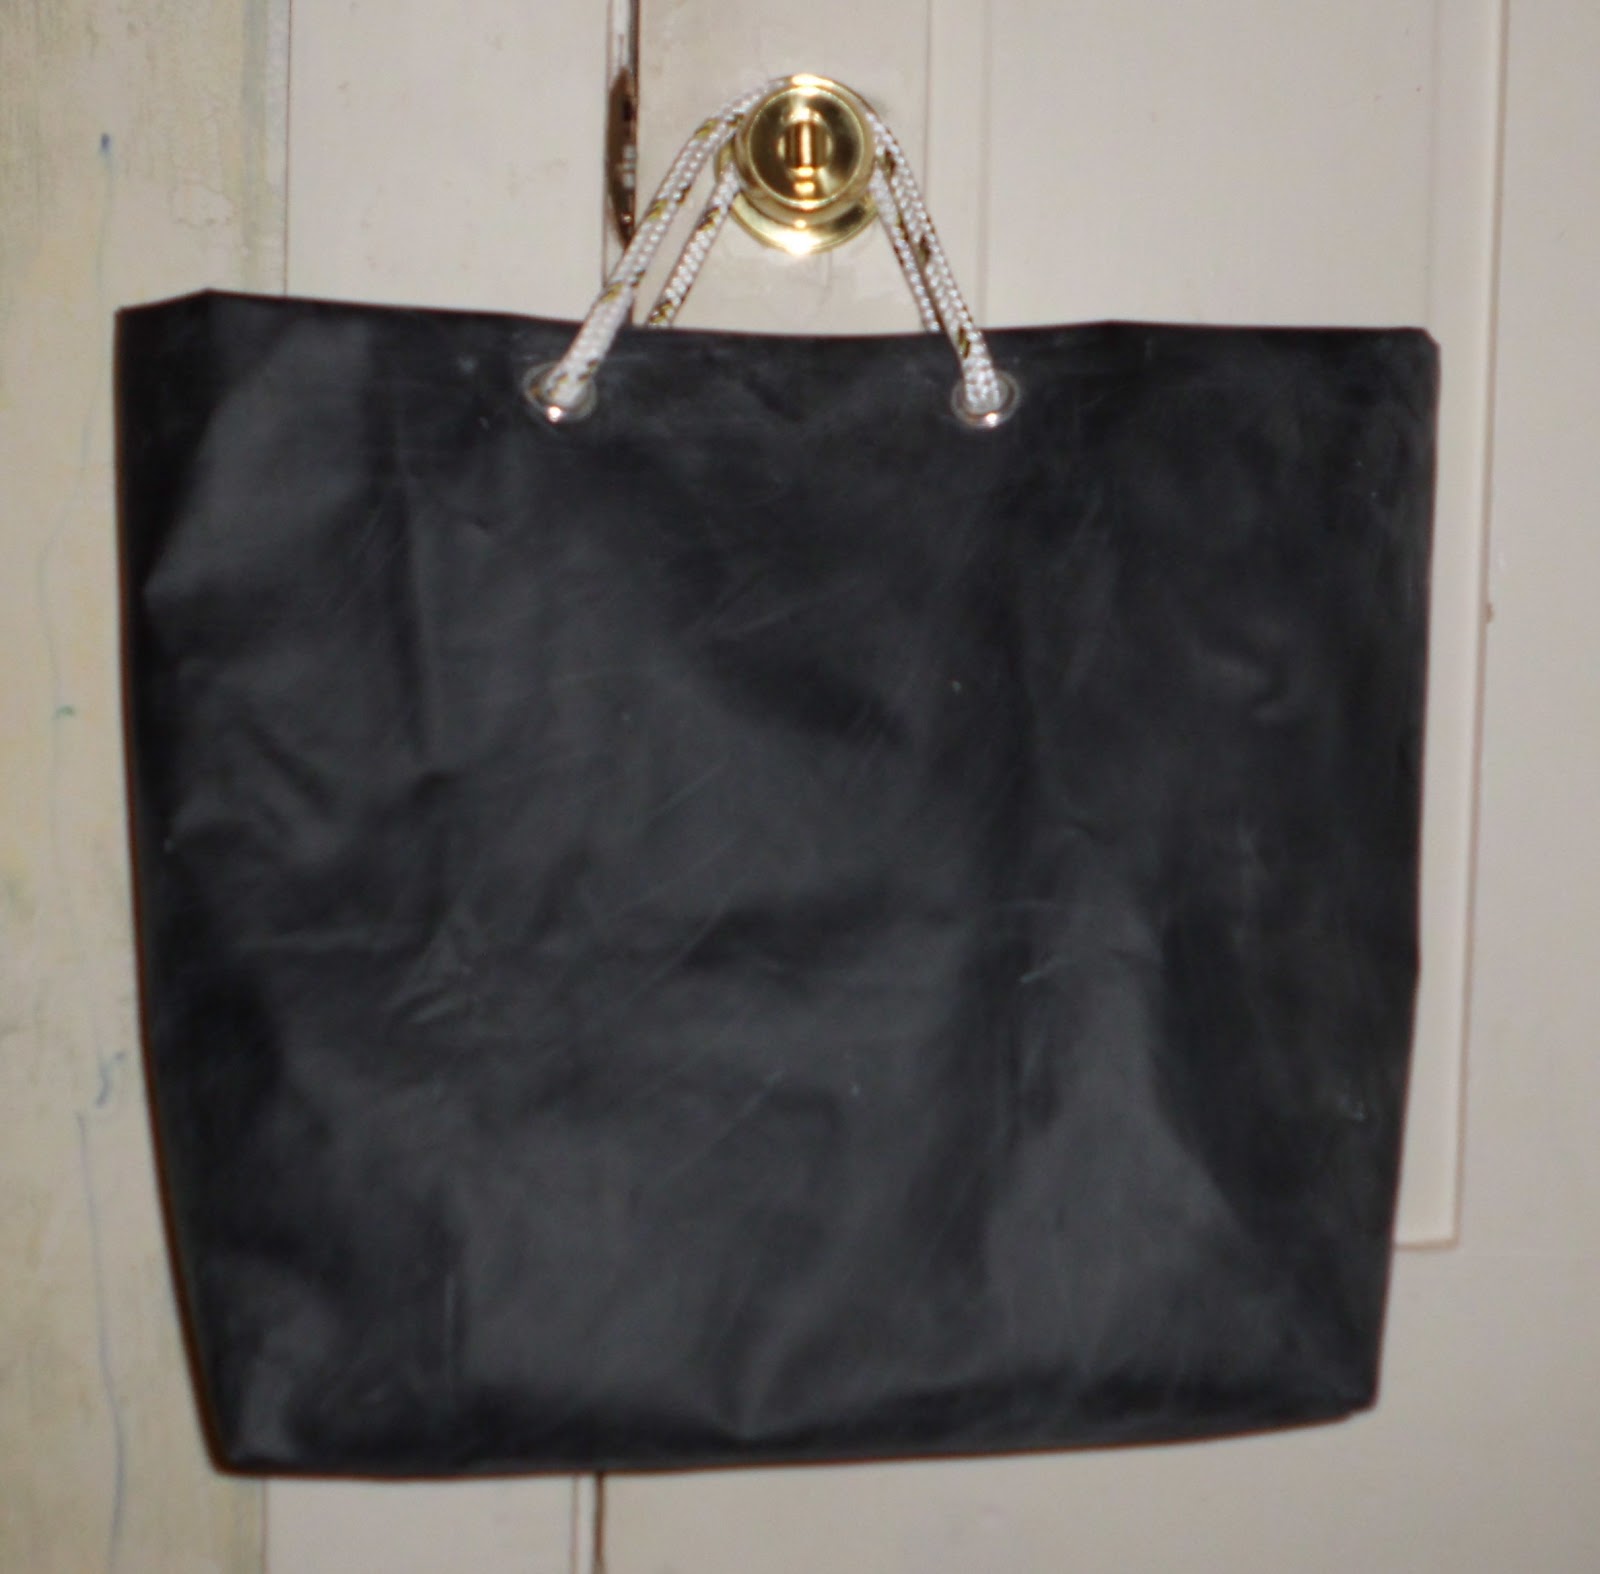
It's a transitional time of year, so I've made a transitional bag. One side nods to summer, with big red numbers on the field of a white sail. The other nods to school, with chalkboard fabric wiped clean and ready to start anew.
The last time I made a bag out of this sail and used the numbers, I was flying in a trapeze show that night. Tonight the theme is Angry Birds, so I was thinking of something that would fit with that. The black fabric was a start. The fact that we use a lot of chalk on our hands only adds to the connection. Plus there are little kids in the show family, so they can draw on the bag while they wait for a turn or a parent to return.
Not much of a tutorial to write, as it's a fairly simple bag. I cut 2 squares of fabric, 21" each. Sewed them together on 3 sides. I reinforced the seams with another round of stitching, since it's pretty sturdy material and I'd hate for the bag to fall apart at the seams. I made a box bottom and that was it for the main sewing.
I cut another rectangle, about 6" x 12" for a chalk pocket. I folded that nearly in half and sewed the edges shut. With the extra flap, I attached the pocket to the center of the top edge of one side. And that was it for all the sewing. I realize now it would have been more secure to have the opening of the pocket facing the fabric of the bag rather than the open middle. As it is, it's really easy to get stuff out, but it's also easy for things to fall out. It's all in what you need the pocket for.
I folded the top edge in about 2.75", to neaten up and reinforce things. The sail cloth is so tightly woven that it doesn't really unravel. The chalkboard cloth is rubbery with a thin woven mesh (like cheesecloth, a construction similar to oilcloth) on the back, so it doesn't unravel either. So there was no need to make a hem or sew the whole thing down. I attached grommets for a rope handle and then added 21" of rope, knotted at the ends, for handles.
I'm not such a fan of shoulder-carried grocery type bags. I don't know exactly why. Probably something to do with habit and the fact that until a few years ago, grocery bags only came in paper and had short handles. So I made short handles. In hindsight, it's probably best not to carry a bag covered in chalk too close to your body. Which is also why I didn't make both sides out of chalkboard fabric. I had a vision of myself walking along in stylish black pants and getting completely covered in chalk dust.
The last time I made a bag out of this sail and used the numbers, I was flying in a trapeze show that night. Tonight the theme is Angry Birds, so I was thinking of something that would fit with that. The black fabric was a start. The fact that we use a lot of chalk on our hands only adds to the connection. Plus there are little kids in the show family, so they can draw on the bag while they wait for a turn or a parent to return.
Not much of a tutorial to write, as it's a fairly simple bag. I cut 2 squares of fabric, 21" each. Sewed them together on 3 sides. I reinforced the seams with another round of stitching, since it's pretty sturdy material and I'd hate for the bag to fall apart at the seams. I made a box bottom and that was it for the main sewing.
I cut another rectangle, about 6" x 12" for a chalk pocket. I folded that nearly in half and sewed the edges shut. With the extra flap, I attached the pocket to the center of the top edge of one side. And that was it for all the sewing. I realize now it would have been more secure to have the opening of the pocket facing the fabric of the bag rather than the open middle. As it is, it's really easy to get stuff out, but it's also easy for things to fall out. It's all in what you need the pocket for.
I folded the top edge in about 2.75", to neaten up and reinforce things. The sail cloth is so tightly woven that it doesn't really unravel. The chalkboard cloth is rubbery with a thin woven mesh (like cheesecloth, a construction similar to oilcloth) on the back, so it doesn't unravel either. So there was no need to make a hem or sew the whole thing down. I attached grommets for a rope handle and then added 21" of rope, knotted at the ends, for handles.
I'm not such a fan of shoulder-carried grocery type bags. I don't know exactly why. Probably something to do with habit and the fact that until a few years ago, grocery bags only came in paper and had short handles. So I made short handles. In hindsight, it's probably best not to carry a bag covered in chalk too close to your body. Which is also why I didn't make both sides out of chalkboard fabric. I had a vision of myself walking along in stylish black pants and getting completely covered in chalk dust.
Saturday, July 28, 2012
Week 30 or The Man Bag
Last week I made a prototype of a small wristlet. This week I made the commissioned bag. It went rather smoothly and turned out well, if I do say so myself. The customer had requested blue denim with sailcloth interior "for a nautical look." I decided not to use the standard orange jeans thread and went with matching blue thread, to preserve the nautical look.
If you want one, leave a comment and we can talk fabric, features and price.
Tuesday, July 24, 2012
Week 29 or The Wristlet
It would be great if I could make a living off this crafting stuff. At the rate I'm going, though, I'll be pulling in about $250 a year. Not exactly enough to make a difference. That being said, I did make a couple of sales this week.
One was the Mondriaan Ikea bag. The buyer requested that longer handles be added. I was going to make them red, like the other handles, but I had used up all that material on the poodle skirt for the Grease costume. I had some of the Mondriaan fabric left, so I made them out of that. One side of the handle was the white, red and green strip, the other side was black and red. Not quite the same, but coordinating and with some punch. I was pleased that the buyer said I should put my name on it. Luckily I had remembered my tag, and even added the blog address and week number. I felt so professional!
The other sale was a duct tape wallet. I was paying for brunch at the diner around the corner and the waitress noticed my hot pink wallet and said "You could sell those. I'd buy one." So I made her a leopard print one with a hot pink lining. She commented that it looked so neat and even, which is good because I have a habit of not dotting all my i's and crossing all my t's when it's for myself. I'll blame it on a background in theater, where things really only have to look good from the audience, not necessarily up close and in full light.

Today's project is the test run for a commission. We're calling it "The Man Clutch" but it's more of a wristlet, since it has a little wrist strap. The bag needs to hold, keys, cards, bulky phone and the detritus that accumulates over the course of a day. He decided on a denim exterior and a sail cloth lining, with card slots and a key clip. This is the one he found online, but it's a bit pricey. And it's not lined. And it has no interior detailing.
We settled on 4.5" x 8" x 2", which is just about the size I need to carry most of my daily detritus. At least when I don't have the kids with me. Because then I need room for snacks, water bottles and whatever plastic flotsam (thank you, Cake Wrecks) they pick up in the course of the day. So I made one for myself out of some lovely tan organic denim that's been rotting away in my stash for about 12 years.
It turned out to be relatively easy to make. I looked at Sew Sweetness' zipper-top bag for a bit of direction on how to attach the lining. No big zipper secrets other than to sew the fabric to the zipper one piece at a time. Since I wanted an exposed zipper, I didn't need to follow her instructions for that step.
It turned out that the hardest part was getting the card slots aligned and even. That waitress was right, it's the details that make things stand out, for better or for worse. It bothers me that the strap isn't centered on the zipper. I'll trim the interior seams more closely so things aren't as poofy in the inside. I'll leave a gap in the lining where it meets the ends of the zipper so it works more smoothly. And I'll let the zipper extend down the sides just a bit more, for easier access. But all in all, I think it turned out quite nicely for a first draft.
UPDATE 9/27/2012: It's holding up nicely. The interior "puffiness" has settled down as I've stuffed it to the gills several times over the last few months. This is now my go-to bag and my shoulders thank me for switching from a cross-body bag. It didn't help that it was a bit bigger, I carried a larger ladies' wallet instead of a duct tape billfold, and I kept it completely filled most of the time. One of these days I should wash it to clean up the handle, but other than that the stains are not showing.
One was the Mondriaan Ikea bag. The buyer requested that longer handles be added. I was going to make them red, like the other handles, but I had used up all that material on the poodle skirt for the Grease costume. I had some of the Mondriaan fabric left, so I made them out of that. One side of the handle was the white, red and green strip, the other side was black and red. Not quite the same, but coordinating and with some punch. I was pleased that the buyer said I should put my name on it. Luckily I had remembered my tag, and even added the blog address and week number. I felt so professional!
The other sale was a duct tape wallet. I was paying for brunch at the diner around the corner and the waitress noticed my hot pink wallet and said "You could sell those. I'd buy one." So I made her a leopard print one with a hot pink lining. She commented that it looked so neat and even, which is good because I have a habit of not dotting all my i's and crossing all my t's when it's for myself. I'll blame it on a background in theater, where things really only have to look good from the audience, not necessarily up close and in full light.
We settled on 4.5" x 8" x 2", which is just about the size I need to carry most of my daily detritus. At least when I don't have the kids with me. Because then I need room for snacks, water bottles and whatever plastic flotsam (thank you, Cake Wrecks) they pick up in the course of the day. So I made one for myself out of some lovely tan organic denim that's been rotting away in my stash for about 12 years.
It turned out to be relatively easy to make. I looked at Sew Sweetness' zipper-top bag for a bit of direction on how to attach the lining. No big zipper secrets other than to sew the fabric to the zipper one piece at a time. Since I wanted an exposed zipper, I didn't need to follow her instructions for that step.
It turned out that the hardest part was getting the card slots aligned and even. That waitress was right, it's the details that make things stand out, for better or for worse. It bothers me that the strap isn't centered on the zipper. I'll trim the interior seams more closely so things aren't as poofy in the inside. I'll leave a gap in the lining where it meets the ends of the zipper so it works more smoothly. And I'll let the zipper extend down the sides just a bit more, for easier access. But all in all, I think it turned out quite nicely for a first draft.
UPDATE 9/27/2012: It's holding up nicely. The interior "puffiness" has settled down as I've stuffed it to the gills several times over the last few months. This is now my go-to bag and my shoulders thank me for switching from a cross-body bag. It didn't help that it was a bit bigger, I carried a larger ladies' wallet instead of a duct tape billfold, and I kept it completely filled most of the time. One of these days I should wash it to clean up the handle, but other than that the stains are not showing.
Saturday, July 07, 2012
Week 27 or The Lego Box
Somewhere out there you may have seen a giant bag that opens up into a playmat. You put your toy with a million tiny parts in the bag. When the kids want to play, they open up the bag and, in theory, play with the million tiny parts on the playmat. When they're done, they just close up the bag and all the parts are still in it, not hidden in the pattern of the carpet waiting to bite your feet in the dark or get vacuumed up.
I run the FIRST Lego League teams at my kids' school. Right now we have two 3-gallon buckets (like a 5-gallon utility bucket, but shorter) that get dumped out on the carpet when they start building. Cleaning up takes about 10 minutes out of every hour-long meeting. Not a good use of time. I have to remind them that any pieces they don't pick up will get taken by the kindergarteners who gather in the library before school each day. Pulling eye teeth and herding cats come to mind. It would seem that the big bag would work well in this situation.
Out came the graph paper, the giant stiff sail, some cotton webbing and a few plastic yard signs from a charity walk, a political campaign and a roofer. One thing I learned is that you don't need a big fat needle to sew with thick upholstery thread. In fact, it just makes the going rougher when you've got very tightly-woven material to deal with. And it gums up the machine something awful when the thread keeps getting caught underneath. That's also why this project has been languishing for 3 weeks.
| Just the fabric, without the stiffening boards inside. Mat is turned over from play side. |
Two days later, I added carrying straps. I marked places on the folded panels where I thought the ends should go. I unfolded the mat and cut webbing to go the distance between the marks.
Note to self: be sure to designate which sets of handle marks go together. It would be very easy to put the straps on in such a way that the box would not fold up.
Stroke of luck: what looked like a very long handle turned out to be just the right length to meet at the top of the box and be easy to grab. Also, a good yank on the handle helps the bag to fold up.
Laziness pays off: No stiffening in the lid makes it easier to conform to the slightly wonky shape of the box.
Now imagine that surrounded by 6 kids, age 5-11, building a cookie bakery or a Trojan Gummy Bear or a bird-powered cheesy popcorn factory.
Sunday, July 01, 2012
Week 26 or The Case of the Sail and the Shirt
Is it a bag or just an impostor? Either way, it's what you're getting this week.
We're a big reading family. There's more than one book case for each family member, and they're all full. My husband used to travel with a back-breaking load of books no matter where he went or for how long. When e-readers came out, he hemmed and hawed, not being an early adopter, but he finally got one. When our older daughter, at 8 years old, wanted to read The Hunger Games, we got it on the Kindle and she was able to enlarge the font enough to enjoy and rip through the whole series. Since then, I don't think she's read a paper book. So we got her one of her own, used from a friend who was transitioning in the other direction. It came with a spiffy hard neon green case.
Dad, on the other hand, had a black canvas envelope clutch I made in about 5 minutes one morning as he was heading out the door and wanted something to protect the screen. I say "had" because nobody knows where it is now. For a week he's been carrying the e-reader around wrapped in a tea towel. So I rummaged through my supplies and made him a new one. A scrap of sail too small for much of a bag. The sleeve of one of his worn out button down shirts. Leftover quilt batting from the previous principal's retirement quilt. Last, but certainly not least, and most miraculous of all, a zipper that happened to be the right color and length, and not come from an old project and need work to use!
For guidance on getting the zipper in correctly, as in useable and not with the pull stuck inside with the stuffing, I turned to this tutorial for a wallet that turns into a shopping bag. (That's a project for another week.) The most helpful hint there was to leave a gap to pull the end of the zipper out. The end isn't quite centered, but it's close enough that it closes properly and doesn't look funny. I had to make the lining in two pieces, with a seam down the middle so that it could be turned right-side-out after sewing the zipper in between the two layers. Helpful hint, discovered by accident: baste a bit of the center of that gap so it behaves like a complete piece of fabric instead of something with a big gash in the middle.
I'm still working on a bag/box/play surface for the Lego collection, but I haven't even started on the lid or the handles, so that will have to wait for another week. And this being Week 26, I'm half-way done!
Friday, March 23, 2012
Week 12
The second bag for Martha, this time 1939.
This one is my second iteration of the red and white 1475 bag from a few weeks ago. The sail is much softer and the top material is much stiffer, so this one does not stand up on its' own. It's probably also not as water-resistant, but it does have some spiffy topstitching along the upper edge.
I also figured out how to get the rope through the grommets more easily. You put tape on either side of where you want to cut the rope. Then you melt the raw end so it doesn't fray. I had been leaving too long of space between the tapes.
Wednesday, March 14, 2012
Week 11
There are a couple of seams on the back from the sail. I imitated the original stitching style of the sail in the topstitching. Upholstery thread to match the durability of the fabric. More grommets and seaworthy rope for the handles. I considered using light blue for the side and bottom panels, but didn't have anything that matched well and was wide enough, so I just went with a monochrome look.
Saturday, February 18, 2012
Week 8
I spent a fair chunk of sewing time making a horse costume for that. Just a tail, an embellished t-shirt and a headband with ears, but the little things always take more time than you'd expect. I wasted some sewing energy making a pair Colonial-era aprons and caps for a 3rd grade dramatic reading of the Declaration of Independence which ended up not needing costumes.
Saturday, February 11, 2012
Week 7
Saturday snuck up on me this week. I was busy with other things and thought I didn't have time, but then a couple of 2-hour holes appeared in Friday's schedule and I took advantage of them to make my bag of the week. Good friends and good planning made this week's bag possible.
I'm calling it my Quack Bag. That's Quack. He's a character from Peep and the Big Wide World, which if you ask me is about the best little kids (science) show out there. Quack is a duck. He's blue. He wears a sailor hat. There's a beaver, named Beaver Boy. He has trouble remembering names. So he calls Quack "Blue Sailor" because of his sailor hat.
This bag is made of remnants from the local sail shop. And it's blue.
Pretty basic construction this week. Four short blue strips sewn together to make the two faces of the bag. One long very dark blue strip to go down the sides and across the bottom. One long skinny white strip to go around the inside of the top edge. Four giant grommets and four scraps to reinforce the holes. Four feet of thick rope for the handles.
I sewed the short strips together in pairs and topstitched the seam down because the material is so stiff that seam would never lie flat on its own. I sewed the long dark strip around 3 sides of the faces. I sewed the skinny strip inside the top edge. Then I sewed the ends of it together and topstitched along both edges. Next time I might put the white strip on the outside of the bag, as more of a nod to Quack's hat.
Next came holes for the grommets and hammering the grommets in place. Nothing like a good session with a hammer to work out your frustrations! I cut the rope to length and melted the ends to keep them tidy and help them get through the holes. Four knots and I was done.
No pictures of the process this week because I was too focused on just getting the thing made. At some point I need to decide if this is going to be a tutorial blog of a voyage of discovery blog. If you have any thoughts, post them below.
I'm calling it my Quack Bag. That's Quack. He's a character from Peep and the Big Wide World, which if you ask me is about the best little kids (science) show out there. Quack is a duck. He's blue. He wears a sailor hat. There's a beaver, named Beaver Boy. He has trouble remembering names. So he calls Quack "Blue Sailor" because of his sailor hat.
This bag is made of remnants from the local sail shop. And it's blue.
Pretty basic construction this week. Four short blue strips sewn together to make the two faces of the bag. One long very dark blue strip to go down the sides and across the bottom. One long skinny white strip to go around the inside of the top edge. Four giant grommets and four scraps to reinforce the holes. Four feet of thick rope for the handles.
I sewed the short strips together in pairs and topstitched the seam down because the material is so stiff that seam would never lie flat on its own. I sewed the long dark strip around 3 sides of the faces. I sewed the skinny strip inside the top edge. Then I sewed the ends of it together and topstitched along both edges. Next time I might put the white strip on the outside of the bag, as more of a nod to Quack's hat.
| Who says a bag can't smile? |
Next came holes for the grommets and hammering the grommets in place. Nothing like a good session with a hammer to work out your frustrations! I cut the rope to length and melted the ends to keep them tidy and help them get through the holes. Four knots and I was done.
No pictures of the process this week because I was too focused on just getting the thing made. At some point I need to decide if this is going to be a tutorial blog of a voyage of discovery blog. If you have any thoughts, post them below.
Saturday, January 21, 2012
Weeks 3 & 4
I'm getting ahead of myself. Once again, I have taken one garment and made 2 bags. This week, it's a button-down shirt.
The first bag is a pure recycle, nothing added but thread. A model I've made before. I like to think it's getting better each time. Actually the first one was really quite good, the next two were way too big and now it's good again.
The body of the bag is made from the body of the shirt. The button placket has been sewn shut, but the chest pocket remains. I used some scraps to make handles.
The finishing touch, a stroke of genius if I do say so myself, is to use a cuff to make a dual function closure. You can roll up the bag and use the cuff to keep it small and tidy when not in use. Or you can use the cuff to keep the top closed and stuff from falling out when it's full. Like two baguettes.
The second bag has some sail fabric added. As I mentioned before, I picked up a pants-bag full of scraps from a local sail maker. The dark blue goes with the plaid, so I used one strip for the sides and bottom and another for a facing strip at the top.
The front and back of the bag are cut from the sleeves of the shirt. I've made bags from just sleeves, but they're always a bit too small to be really useful. (Apologies to those of you with kids in the Thomas phase.)
One handle comes from the collar and the other is made from another scrap. I kept the button & buttonhole on the collar and added one of each on the other side of the bag so it could be closed up a bit. This bag does not have a handy dandy folding mechanism, but I like it just the same.
The first bag is a pure recycle, nothing added but thread. A model I've made before. I like to think it's getting better each time. Actually the first one was really quite good, the next two were way too big and now it's good again.
The body of the bag is made from the body of the shirt. The button placket has been sewn shut, but the chest pocket remains. I used some scraps to make handles.
The finishing touch, a stroke of genius if I do say so myself, is to use a cuff to make a dual function closure. You can roll up the bag and use the cuff to keep it small and tidy when not in use. Or you can use the cuff to keep the top closed and stuff from falling out when it's full. Like two baguettes.
The second bag has some sail fabric added. As I mentioned before, I picked up a pants-bag full of scraps from a local sail maker. The dark blue goes with the plaid, so I used one strip for the sides and bottom and another for a facing strip at the top.
The front and back of the bag are cut from the sleeves of the shirt. I've made bags from just sleeves, but they're always a bit too small to be really useful. (Apologies to those of you with kids in the Thomas phase.)
One handle comes from the collar and the other is made from another scrap. I kept the button & buttonhole on the collar and added one of each on the other side of the bag so it could be closed up a bit. This bag does not have a handy dandy folding mechanism, but I like it just the same.
Subscribe to:
Posts (Atom)