My first step was to sew the rectangles into a strip. Just so they would work more easily with their compatriots. Then I searched my stash for more long narrow bits, because I had what looked like a small bag and half, or a bag without straps, worth of strips. I found the border of a plushie panel from Spoonflower. You've all heard of Angry Birds, but this was Angry Vegetables. Not really something I want to use as a panel, so it became the facing for the upper edge. And, yes, my children like their roots of some evil.
I was rooting around for a bag to imitate for size and found my old hieroglyphics bag from Cairo. It's about 17" square, with no box bottom or anything fancy. Mine had the straps replaced many moons ago and I can't use it for knitting any more on account of the holes in the corners. There's no WAY I paid $26 for that thing, but I did pay with a year of my life. If anyone asks, AFS, at least in Egypt in the 1980's, is like the Peace Corps, the toughest school year you'll ever love. I know I learned a lot more there than I ever would have staying behind to put in a 4th year of high school.
 |
| The female half of the snap. |
First I folded the body in two and sewed up the edges. Then I pinned the handles and facing in place. Then I took out the pins because I had put the right side of the facing on the wrong side of the bag and the handles were not sandwiched between the two. Then I pinned the facing to the top edge of the bag, with the right sides facing each other and the handles sandwiched in between the layers. At last I sewed the ends of the facing together and along the top edge. Then I sewed 1/4" farther in from the top edge to make it all a bit more secure. I turned the facing to the inside and ironed everything good and flat. One last round of topstitching around the top and I felt like the handles would actually support a load of groceries and the facing would not flip over to the outside.
 |
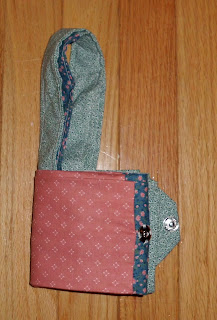
| Folded once and showing the male half of the snap on the flap. |
 |
| The strip. |
Happy shopping!
 |
| The strip folded twice and about to perform snap-mating. |
 |
| Ready to roll! |

No comments:
Post a Comment