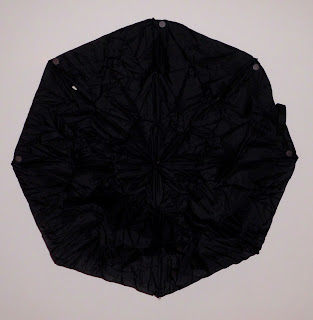
 I've been collecting broken umbrellas for different reasons. At first, I wanted the frames to make little greenhouses for the container garden on my sidewalk. Then I had to find something to do with the fabric, so I made a bunch of umbrella skirts for my daughters and myself. Then I thought I'd make a bag, but I wasn't quite sure how to do it. So I just made it up as I went along.
First you cut the fabric off the frame. I used a seam ripper because you can stick it in the little loops of thread and cut them without touching the fabric.
 Then you cut the fabric away from the top hub. This leaves a little hole, which I had been wracking my brain trying to figure out how to close it. At this point, it probably would have been a good idea to iron the fabric, but I left that for the final step.
Before going any further, I reinforced the seams from the outer edge in to the last snipped attachment point. The sewing unravels very quickly, but I realized I might need to open up the seams to make the bottom work. It ended up being a convenient place marker later on.
I decided to use half of the sections to make inner pockets. For this umbrella, that meant 2 inner pockets. If your umbrella has only 6 sections, you'd could leave 4 sections for the outside and get one pocket or have just one flappy pocket and 2 inner pockets. I wanted to keep the closing tab to be able to pack the bag up, so I made sure to leave that section as an "outer" piece. I folded the fabric in half along seam lines and just sewed the two outermost quadrants together along the seam line, down to the same point I stopped reinforcing.
Then I lined up the outermost corners with the opposite new seams and sewed along that line to the same point. If you look at the open end of the 8-panel bag, you can make a square with the four outer panels and a four-layer diagonal. 3 pockets for the price of 2!
The trickiest part was figuring out how to close off the bottom. I ended up making an X along the two diagonals of that square. I turned the bag inside out with the pocket diagonal folded in half. I marked a line perpendicular to the outer edge where I wanted the bottom to be. I chose the end of the reinforcement sewing again, but you could put it anywhere. I pinned across the stopping point and turned the bag right side out to check that I had the correct spot. Then I sewed along the line. Then I did the other side.
Next, I turned the bag inside out at the center of the pocket diagonal and basted that shut. I noticed that the bottom corners I had just sewn weren't anywhere near each other, so I took out the center of the seam, pulled them into place and sewed it again.
 I couldn't find any narrow black strapping, like you'd find on a bike helmet, so I used some leftover blue satin ribbon. I folded that in half end to end, sewed the edges together then cut it in two. I placed the handles so the top edges make an X when you pick the bag up.
You can still fold it up and throw it in your bag like the compact umbrella it once was, only now your wallet won't get wet. I'm not sure how practical it is for carrying large amounts of stuff, but it was fun to figure out how to make it and I like the way it looks.


1 comment:
I love this bag! It is so creative and functional. I can see myself using it as a dress up bag when I go out as well. Thanks! 8D
Post a Comment