Friday, October 26, 2012

Week 43 or The Bakery Bag Collection

Yes, I am going to do the craft fair on December 1st. Thank you very much for asking.

A & J King's rack o' bread.
The epi is on the bottom shelf.
It's a pull-apart baguette
without an end for everyone.
I had to make myself another baguette bag, since I am now buying two loaves of long, skinny bread at a time. One baguette for school lunches and an epi for an group snack when I have 2 extra kids between school and gymnastics. You can't expect them to make it all the way from lunch to 4:30 without some extra calories! Especially when you're also asking them to 75  minutes of gymnastics and half an hour of running around on the playground. No sports drinks, though. That's why they make water fountains, girls!

I used a different font on the upper edge of the bag. It didn't turn out nearly as well, so I'll be going back to the original font. On the machine it looks like a printing font but it turns into cursive when it's sewn, since it doesn't cut the thread between letters. To the lady at the bakery who said people would buy them: be at the fair; the bags will.


The cookie bag.

I also sewed up a bunch of small bags from the scraps of the apple bags. It's the beginning of my Bakery Bag Collection. There's the cookie bag, which will hold a large chocolate chip, oatmeal raisin or peanut butter cookie. Then there's the biscotti bag, which I realize is just cookie in another language.  It's a tiny version of the baguette bag.
The biscotti bag.
Perhaps next week will bring the sandwich bag. But probably not the cake bag, although you never know. Carrying those boxes can be a challenge. And they certainly don't fit in a regular bag. Definitely not a sticky bun bag. That would just get too gross too quickly. If you have any other suggestions, write them in the comments.


Saturday, October 20, 2012

Week 42 or A Bushel of Apples

This week's crop
I think I'm going to go through with the craft fair. I have yet to shell out the $20 table fee, but I made another 6 apple bags this week and put some work into making little drawstring bags out of the remnants.

If you can't make it out to Salem for the fair on December 1st, stop by Shoplocket and get a bag any time.


Saturday, October 13, 2012

Weeks 40 & 41 or Pick an Apple


In an effort to get back on schedule, I made 4 bags. It feels like cheating to make the same bag over and over again. But hey, I've made it all the way to October and I've fallen back a bit on the schedule. Just one week. Which can be made up by going back and counting the number of bags I've made instead of the number of posts I've written. I need to cut myself some slack here. To be honest, I didn't think I'd make it this far.

Another way to look at it is that I've figured something out. A friend asked if I wanted to sell at her church's craft fair in early December. I'm considering it, and trying to apply the lessons I learned selling at craft fairs before I had kids.

  1. Nobody likes a sourpuss. If you're going to sell something, you have to talk to people.
  2. Variety may be the spice of life, but too much spice will sink a craft table. Pick one thing and do it well.
  3. People are cheap, especially at craft fairs. Price accordingly. Or make some impulse purchase items.
If I am to do this craft fair, I will need to swallow my not-so-inner introvert and be nice to people for a whole morning. I need to make a LOT of one or two related things. And I need to make a LOT of some little throw-away thing that kids and cheapskates can pick up, feel like they're doing a good thing and buy.

So I made 4 of the Apple Bags. Not iBags. Bags that fold up into an apple shape. This time around, they're all red, but at some point I will make green apples. They're actually the perfect bag all around.


  1. I can make lots of them relatively easily, although this time they took longer than I expected to sew up. And that was only partly due to the fact that my sewing table also has my computer on it.
  2. I have a TON of lightweight material that isn't really suited to most other bag patterns.
  3. It's a cute concept which will store and display nicely.
  4. With the scraps, I can make little coin purses, gift bags, whatever, to sell as impulse items.
  5. They satisfy MY need to sell something useful and unique. Yes, I got the fruit concept somewhere else, but I believe I have made it mine.
Buy it here.
I'll let you know in a week or two whether the fair is going to happen or not. And what I'm making out of the scraps. Until then, save your pennies and save the 1st of December for a winter fair. And hold your horses, because I feel like I've bought myself 2 weeks off from writing with this crop of bags.

Buy it here.
Buy it here.


Sunday, October 07, 2012

Week 39 or A Chalkboard Lego Box


Well, first off I'd like to thank Cynthia for the chalkboard fabric. I've got yards and yards of it. Enough to make bags to hold all my Lego's and those of the Junior FIRST® Lego® League teams at school, plus one to send back to Cynthia as "payment." (Not that she's asking to be paid, I just want to get rid of fabric!)

All closed up, the box looks pretty good.
Next I'd like to state that chalkboard fabric is a horrendous combination of stiff, floppy, thick, and weak. It's perfect for covering a corkboard and having a dual-use surface, except that it would show all the pin holes. It's good for little insert panels on larger projects. It's probably even great for making simple sewn shapes. What it's frustrating for is making large projects with complex seaming and topstitching away from the very edges. Which is to say it's been quite a workout for my sailor language as well as my sewing machine.
This side doesn't look too bad, just wrinkled.
It's vinyl(?), so I can't really iron it.


The stitching went just fine when I was sewing together the simple edge seams on the side panels. Things went swimmingly when I added the velcro and the handles, probably largely because I did that before assembling the whole thing. It even went well when I sewed the center panel in between the side panels. Topstitching at the corners was another matter entirely. I kept getting loops on the back of the fabric, and they got big enough to gum up the machine. At one point, the cover to my drop-in bobbin even popped off from the mangling. Somehow it landed under the far corner of my desk.


Don't look too closely at the stitching outlining the corners.
That's where things broke down. Also do not notice how crooked
the label on the left edge is. I sewed it blind, from the other side. 
I already cut out a second bag and started sewing it up. I have a feeling it will sit half finished for a few more weeks before my wrists recover. Oh well. I cut up a plastic sign to stiffen the sides. By the time I finish the other one, the election should be over and I'll be able to get my hands on infinite amounts of corrugated plastic.

Sunday, September 23, 2012

Week 38 or Another Lego Box

The kids started back at school a few weeks ago. Lego League starts up again this week. For the past two years, I've coached a series of Junior FIRST Lego League teams at the school. This year my older one has aged out of the Junior League and is moving up to the competitive stage. We lost our competitive Destination Imagination teams due to kids graduating and a coach's kids moving out of the school. (Boo on many different levels, but she's still a dear friend, and none of the boo's are directed at her.) So the competitive pressure is on our shoulders. And my daughter only wants to do it so she can go to a championship far away. Our school may be small and poor, but somehow we manage to send a team to the DI national championships on a regular basis. In the 4 years we've been there, three years have seen a team go to Nationals. If only for the financial health of the donor community, I hope we don't go farther than local competition.

So this year I will be coaching two teams, with my kids, instead of four teams, only one of which has my kids on it. A couple of months ago I made a Lego box that we use at home. It seems to be holding up pretty well. When I made that one, I cut out material for a second one. I made the center panel out of clear plastic with Kevlar threads. At some point I forgot which pieces went to what and used one of the plain bits for some other project. How odd that the material was perfectly rectangular and 21" wide! Just what I needed at the time! So one side is cut from stiffer sail fabric, the other from softer sail fabric. I'm sure the kids will be so distraught by the discrepancy that they refuse to play.

Knowing all the pains I took to add the velcro and the handles last time, I sewed them to the components before assembling the box. Way easier. With the extremely stiff center panel, I would have been cursing like a sailor sewing them on this time. Never mind that I then sewed one of the handles into another seam. It came out easily enough with no visible damage.

I had just enough of the Kevlar material to make the lid, so I did. All in one day. OK, maybe two or three days. I had just enough plastic sign material to stiffen two sides, so I did. I may have to wait until after the elections to grab another sign and stiffen the other panels. Then again, if everything works well without it, I may not bother. Right now, it's holding together well enough, but it's definitely not as structured, stackable or tidy as the other box. I also like the idea of having a semi-clear box. Unless I can find two clear plastic panels, I would lose that feature.

Oh, crap. I just checked out the Lego League registration information, and it looks like I'll be asking the PTO for a lot more money than I had intended. Oh well, we're saving a lot by not having the DI teams. And the city wants to encourage STEM (Science, Technology, Engineering and Math) programs, and has a pot of money for that.

Tuesday, September 18, 2012

Week 37 or The Ugliest Fabric Ever

I got this fabric when I lived in Malden, more than a decade ago. It wasn't pretty then and time has not treated it well. We used to live around the corner from two upholstery shops. At some point I asked for their scraps and got a bunch of stuff, this among it.

I made a few Christmas stockings out of it and then it just sat. There's really not much you can do with rubber-backed sage green fabric with a diamond pattern woven in. It's absolutely not appropriate for clothing. Not even costumes. Stuffed animals would be unhuggable. Perhaps placemats, with a nice dark green edging; they would stay put on the table, but who has the decor to match them? I shudder to imagine a room filled with a couch covered in this.

Well, a grocery bag seems as good a use as any. The handles were a scrap from... something. It's actually quite lovely fabric, nice and soft and smooth, perhaps a very sturdy silk. I think I inherited it from my grandmother. She died 16 years ago.

Now you see why I need to make bags every week. My apartment is very slowly emerging from under decades of hoarding. I gave away a fold-up bag to the grocery store bagger yesterday. He's a very friendly guy, with mild special needs that cause him to tell me the story of Bell & Evans chicken whenever I buy their nuggets. Or how he should get his sister in New York City a bag that folds up as small as my Chico bag. Well, I wasn't about to give him something I would have to pay to replace. Plus it was filled with groceries. So I found the other bag in the trunk of the car and ran back to give it to him.


And I have, in a way, replaced a bag derived from the wardrobe of the distinguished grays with a bag worthy of a blue hair. I was a few days late already, so I wasted no time with such niceties as a proper box bottom. (I just tucked the bottom in when I sewed the side seams.) Or a separate step to attach the handles. I did stitch along the lines of the diamond pattern to reinforce the handles, though. It was enough pressure on my obsessive tendencies to see the box bottom diagonals clashing with the diamond diagonals. I could not bear to sew x-boxes to reinforce the handles.

I promise to do something more inspired on Thursday and post again this weekend. OK, maybe not more inspired but at least with nicer fabric.

Friday, September 07, 2012

Week 36 or An Apple for the Teacher

Last week I made a bag that stuffed into a strawberry shape. But a lack of polka dotted fabric, the fact that the bag didn't quite fit into the strawberry and that the strawberry was way bigger than a real-life strawberry led me to rethink the pattern. What's still red and yummy? What's a little bigger that a strawberry? What's a nice thing to give a teacher on her birthday? An apple.


So I modified the pattern to turn the strawberry into an apple. I enlarged the corner block. I added some leaves. I put in little box corners to flatten the bottom of the apple and add a little depth to the bag.

This was a rush job, since I was trying to make it to a trapeze class and still finish the bag so it would only be one day late for my daughter's favorite teacher's birthday. Next time, a stitch on the bottom to keep the drawstring from pulling out of the casing the first time you try to tie it shut.

Friday, August 31, 2012

Week 35 or The Strawberry-Banana Bag


My inspiration was this tutorial, which is itself based on the reverse engineering of a bag she was given.  My fabric must have been slightly thicker than hers because it's a really tight squeeze getting it into the strawberry corner.

I'd add some sparkly polka dots next time, since I don't have red spotted material but I do have fabric paint. And make the berry just a smidge bigger. I like the size of this bag. Much smaller and you can only fit one box of cereal in it. And sew my tag in before I put the sewing machine away.


Buy this one (with or without sparkly silver seeds) or order a custom bag at ShopLocket.

Saturday, August 25, 2012

Week 34 or Chalkboards and sails

It's a transitional time of year, so I've made a transitional bag. One side nods to summer, with big red numbers on the field of a white sail. The other nods to school, with chalkboard fabric wiped clean and ready to start anew.

The last time I made a bag out of this sail and used the numbers, I was flying in a trapeze show that night. Tonight the theme is Angry Birds, so I was thinking of something that would fit with that. The black fabric was a start. The fact that we use a lot of chalk on our hands only adds to the connection. Plus there are little kids in the show family, so they can draw on the bag while they wait for a turn or a parent to return.

Not much of a tutorial to write, as it's a fairly simple bag. I cut 2 squares of fabric, 21" each. Sewed them together on 3 sides. I reinforced the seams with another round of stitching, since it's pretty sturdy material and I'd hate for the bag to fall apart at the seams. I made a box bottom and that was it for the main sewing.

I cut another rectangle, about 6" x 12" for a chalk pocket. I folded that nearly in half and sewed the edges shut. With the extra flap, I attached the pocket to the center of the top edge of one side. And that was it for all the sewing. I realize now it would have been more secure to have the opening of the pocket facing the fabric of the bag rather than the open middle. As it is, it's really easy to get stuff out, but it's also easy for things to fall out. It's all in what you need the pocket for.

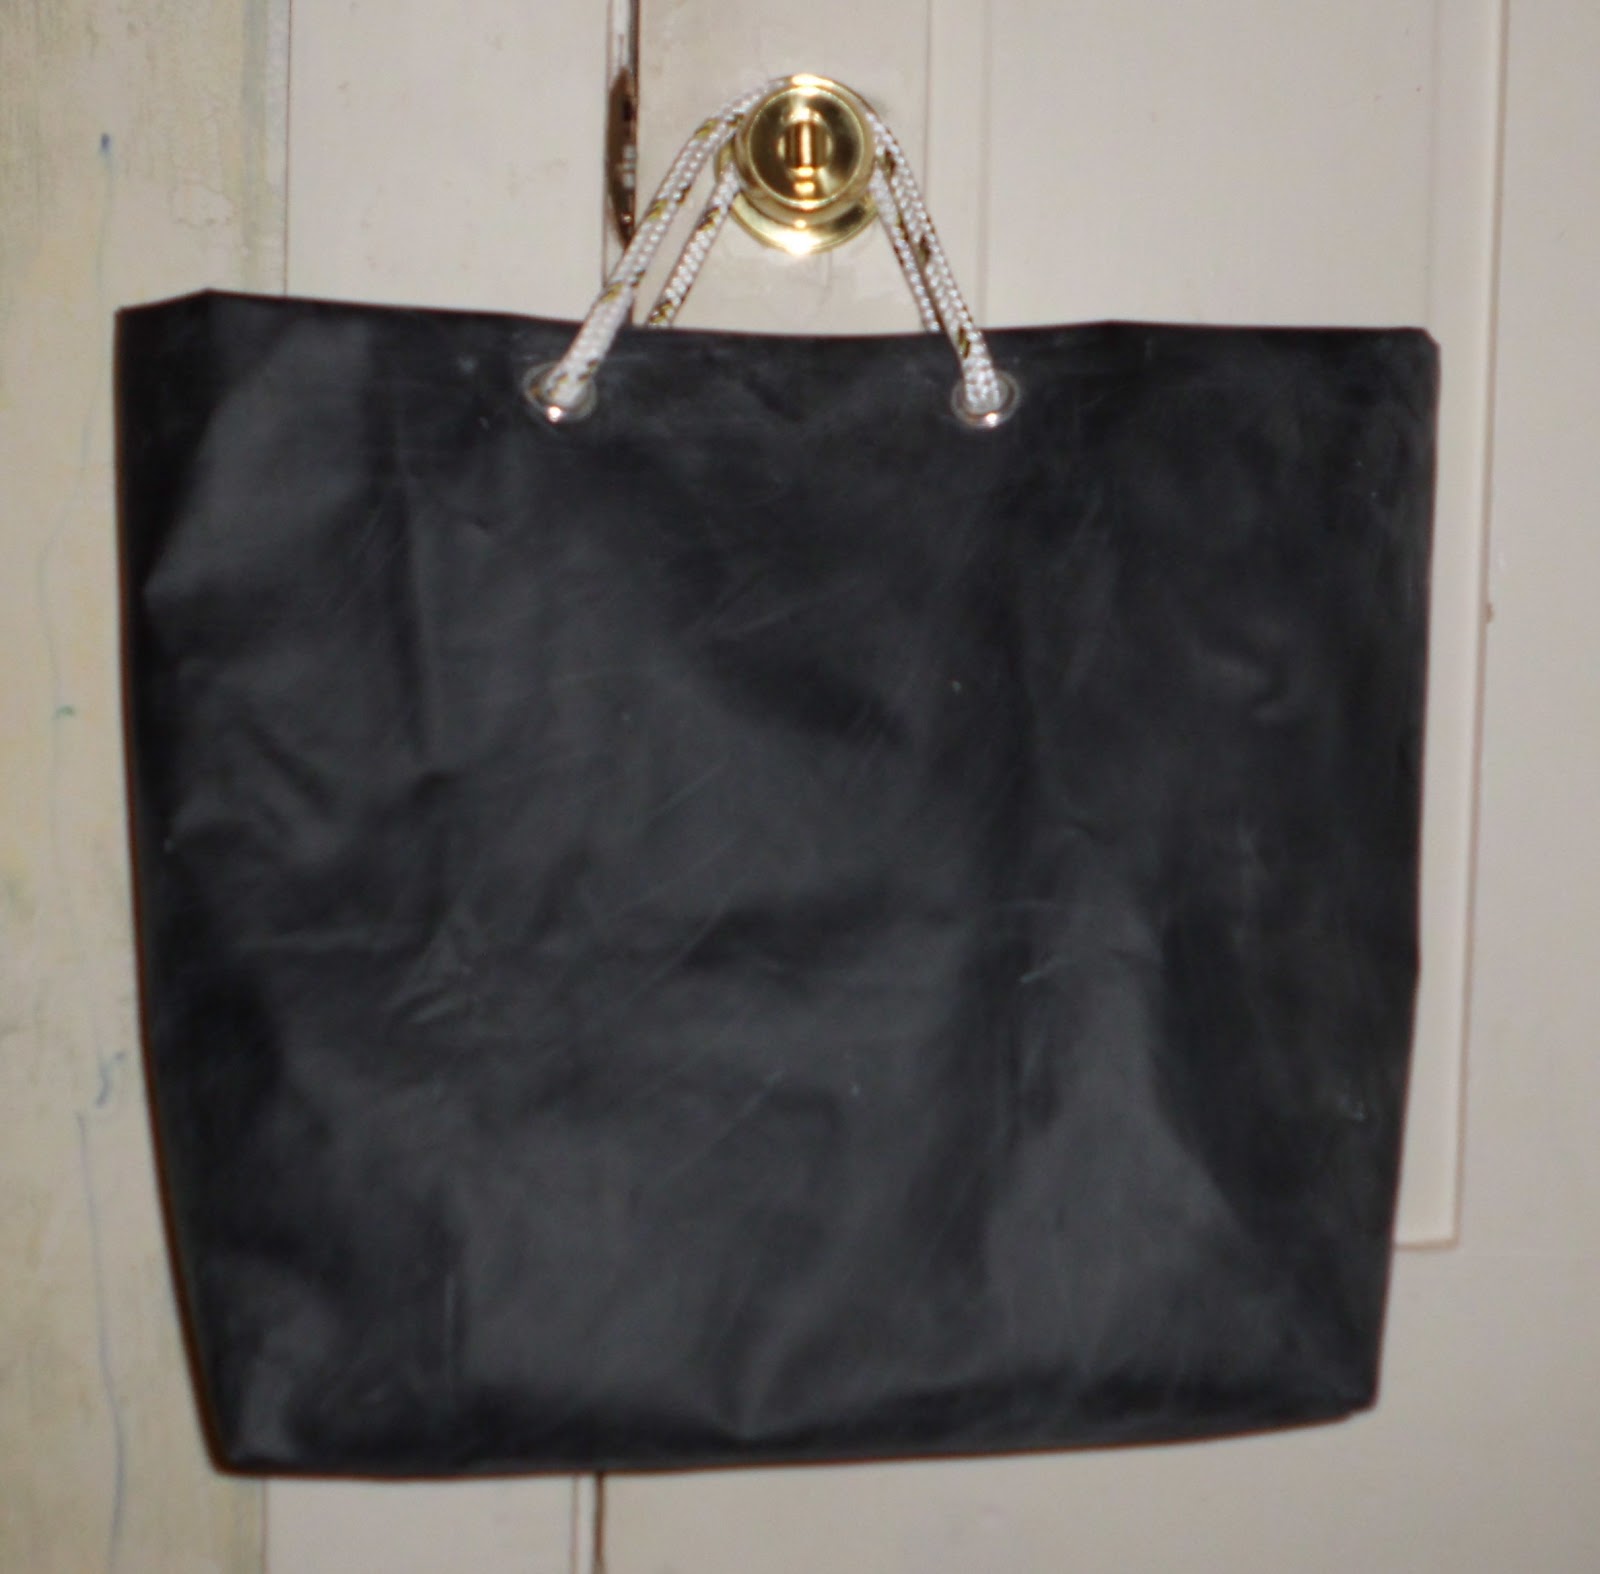
I folded the top edge in about 2.75", to neaten up and reinforce things. The sail cloth is so tightly woven that it doesn't really unravel. The chalkboard cloth is rubbery with a thin woven mesh (like cheesecloth, a construction similar to oilcloth) on the back, so it doesn't unravel either. So there was no need to make a hem or sew the whole thing down. I attached grommets for a rope handle and then added 21" of rope, knotted at the ends, for handles.

I'm not such a fan of shoulder-carried grocery type bags. I don't know exactly why. Probably something to do with habit and the fact that until a few years ago, grocery bags only came in paper and had short handles. So I made short handles. In hindsight, it's probably best not to carry a bag covered in chalk too close to your body. Which is also why I didn't make both sides out of chalkboard fabric. I had a vision of myself walking along in stylish black pants and getting completely covered in chalk dust.

Saturday, August 18, 2012

Week 33 or Patchwork Lightweight


My neighbor left some quilting weight fabric on the back steps. I'm not 100% sure which neighbor, but I'm thankful nonetheless. It was long, narrow strips of two types of material plus random small rectangles of another.

My first step was to sew the rectangles into a strip. Just so they would work more easily with their compatriots. Then  I searched my stash for more long narrow bits, because I had what looked like a small bag and half, or a bag without straps, worth of strips. I found the border of a plushie panel from Spoonflower. You've all heard of Angry Birds, but this was Angry Vegetables. Not really something I want to use as a panel, so it became the facing for the upper edge. And, yes, my children like their roots of some evil.

I was rooting around for a bag to imitate for size and found my old hieroglyphics bag from Cairo. It's about 17" square, with no box bottom or anything fancy. Mine had the straps replaced many moons ago and I can't use it for knitting any more on account of the holes in the corners. There's no WAY I paid $26 for that thing, but I did pay with a year of my life. If anyone asks, AFS, at least in Egypt in the 1980's, is like the Peace Corps, the toughest school year you'll ever love. I know I learned a lot more there than I ever would have staying behind to put in a 4th year of high school.
The female half of the snap.

With two strips of green and one each of red and blue, I cut 36" strips and sewed them together to make the bag body. The excess became the handles. I folded it in half length wise and then folded the raw edges into the center. Then I ironed it all nice and flat and topstitched along each edge. I did a rolled hem on the lower edge of the facing strip and all the pieces were finished.

First I folded the body in two and sewed up the edges. Then I pinned the handles and facing in place. Then I took out the pins because I had put the right side of the facing on the wrong side of the bag and the handles were not sandwiched between the two. Then I pinned the facing to the top edge of the bag, with the right sides facing each other and the handles sandwiched in between the layers. At last I sewed the ends of the facing together and along the top edge. Then I sewed 1/4" farther in from the top edge to make it all a bit more secure. I turned the facing to the inside and ironed everything good and flat. One last round of topstitching around the top and I felt like the handles would actually support a load of groceries and the facing would not flip over to the outside.

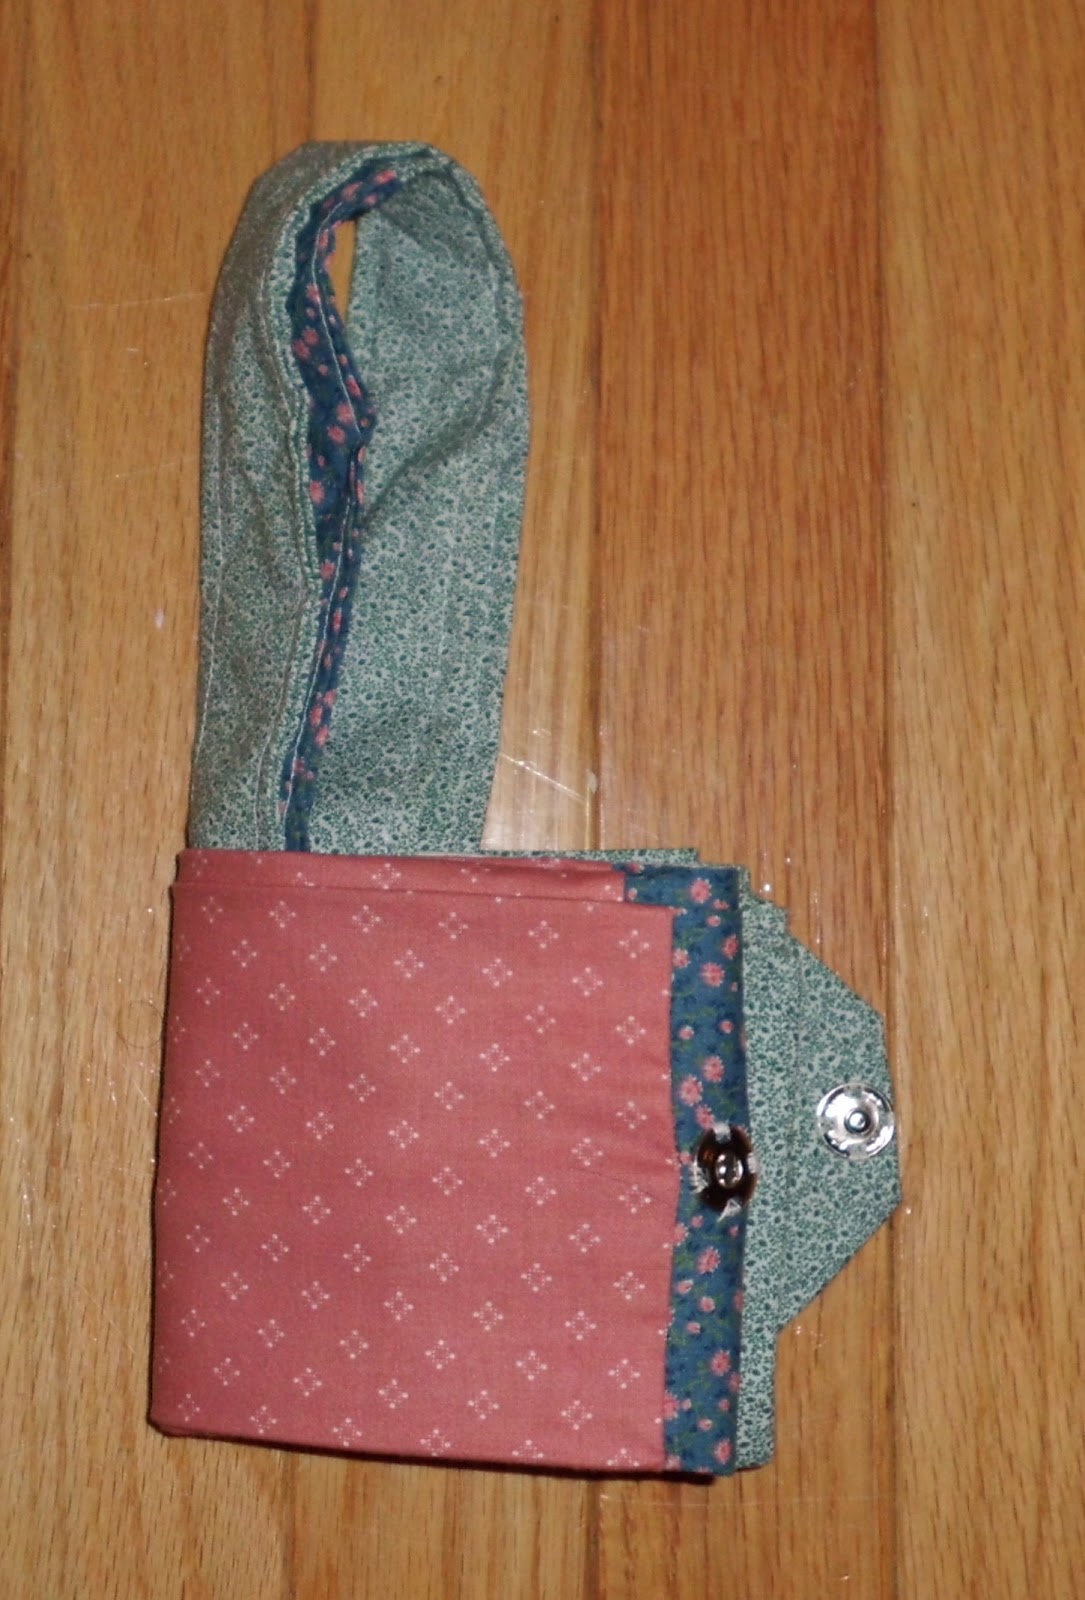
Folded once and showing the male half of the snap
 on the flap.
The last decision was how big to make the box bottom corners. I used to have a bag that would fold up and snap to itself, so I was working on that concept. (It was similar to this one, but smaller, without the logo, and with only one flap.) I divided the height of the bag(17") by 4.5 and used that number (3.77") for the corner size. I made one corner to the inside, like a normal bag. The other corner I made partly to the inside and then the rest to the outside. That became the flap for the snap that holds it all together. I sewed the snaps in place, first putting the "outie" (male) one on the end of the flap. Then I folded it up and marked where the "innie" (female) side should go. I put a scrap of fabric on the inside to reinforce the connection spot and sewed the last snap half on.
The strip.

Happy shopping!
The strip folded twice and about to
perform snap-mating.
Ready to roll!

Friday, August 10, 2012

Week 32 or T-shirt Crochet


Last week, I mentioned that the family was off on vacation, so no bag. Well, we got back today and the bag is done! Nothing like sitting by the pool watching the kids go down the same 4 water slides for 3 hours a day to get stuff made. As long as it's portable.

This bag was my inspiration. Not that mine turned out anything like it. I was going for another grocery-size bag, and I succeeded.

First I cut up one t-shirt into 1 1/14 inch strips using these directions. I grabbed my size P (11.5 mm) hook and started with a 20-stitch chain and then doubled back and did single crochet until I ran out of t-shirt yarn. I had to do 2 stitches in 1 a few times to keep the bottom straight, but I don't remember the exact numbers. Just make it flat. If it curls up into a bowl shape when you're around the corner, you need another stitch or two. If you made a ruffle, you need to take out a stitch or two.

Then I went rummaging through my dad's house and found 7 more shirts, only one of which was colored. I turned 3 of them into yarn. Eventually I got back home and used my rotary cutter, cutting mat and clear plastic gutting guide to make the strips. My hands were happy for the relief from the heavy scissor work.

I did a lap-join (overlapping the ends by about 6" instead of tying them together) and did a row of single crochet with no stitch increases. Then I switched to double crochet for the rest of that shirt and all but the colored and one white shirt. Each (men's size large) shirt only made 1.5 rows, at about 1" per row.

I wanted the colored strip to be a fairly even height and not have a super-obvious beginning and end, so I took it down to single crochet and got 3 rows almost exactly. As luck would have it, I began and ended at the end of the bag, so it's even less obvious. Completely invisible when photographed from the correct side!

I continued with the single crochet but switched to the last white shirt. I did one complete round and then formed the handles. Two inches before the center of one side, I broke away and made a 10-stitch chain. Then I skipped 6 stitches and rejoined the round. I continued on until I got to the same place on the opposite side and did the same thing. After that join, I continued with single crochet until I got to the first handle. Single crochet made it too thick, so I switched to chain stitch on top of the handle. At this point, I was worried, and rightly so, about running out of yarn before I got to the second handle. So I kept up with the chain stitch until I ran out of yarn. I worked the end in and the bag was done.

I'm proud to say that this bag is made of 100% post-consumer recycled material. No "exclusive of decoration" disclaimers necessary. And all the arms and stuff I didn't use here will get used as rags until they fall apart completely. All I have to do is sew in my tag. Click here to buy it now.

Sunday, August 05, 2012

Week 31 or Vacation

I'm supposed to be on vacation right now, but I'll check in to say I'm working on a bag. It's based on this tutorial for a drawstring bag. I took one of my husband's old shirts with me, thinking it would be enough to keep me going for a little while, if not to finish the bag entirely. As it turns out, one shirt will only make the bottom of a bag for me. Luckily my dad is married to a pack rat, so I was able to get more shirts from him, along with one of my own that had been languishing in his basement since my college days. No need to get specific, but it dates from the last century and then some. But it's tie-dyed, and the rest of the shirts are white, so there will be a stripe of color in the mix. Since my goal is to use up fabric, I will not be running out to the thrift store for more shirts, so the bag will be as big as the shirts allow.

One note on finding things. I spent about 20 minutes ransacking my fabric and yarn boxes looking for my giant crochet hook. I bought it just for a project like this, to work with t-shirt yarn. Then I moved my "office" space within the house and put my roll of knitting needles and crochet hooks somewhere very sensible and obvious. To my 6-months-ago-self. My today-self did not think the spot so obvious any more. Now that I have the hook, though, I will be on the lookout for more shirts from which to make a crocheted rug for the living room.

Another fabric score comes from a teacher friend who just moved and must have found things in the process. I now am the proud owner of chalkboard fabric. Which until now I did not know existed. I think I shall have to use it for the 3rd Lego box/bag/mat. How fun is that? It's nice and sturdy and the kids can sketch their ideas on the lid!

Saturday, July 28, 2012

Week 30 or The Man Bag


Last week I made a prototype of a small wristlet. This week I made the commissioned bag. It went rather smoothly and turned out well, if I do say so myself. The customer had requested blue denim with sailcloth interior "for a nautical look." I decided not to use the standard orange jeans thread and went with matching blue thread, to preserve the nautical look.

This bag has all the features of mine, minus the off-center handle and the zipper that gets caught in the lining fabric. So: 6 card slots, wallet and phone pockets, key clip. Final dimensions are 8" x 4.25" x 2"


If you want one, leave a comment and we can talk fabric, features and price.

Tuesday, July 24, 2012

Week 29 or The Wristlet

It would be great if I could make a living off this crafting stuff. At the rate I'm going, though, I'll be pulling in about $250 a year. Not exactly enough to make a difference. That being said, I did make a couple of sales this week.

One was the Mondriaan Ikea bag. The buyer requested that longer handles be added. I was going to make them red, like the other handles, but I had used up all that material on the poodle skirt for the Grease costume. I had some of the Mondriaan fabric left, so I made them out of that. One side of the handle was the white, red and green strip, the other side was black and red. Not quite the same, but coordinating and with some punch. I was pleased that the buyer said I should put my name on it. Luckily I had remembered my tag, and even added the blog address and week number. I felt so professional!

The other sale was a duct tape wallet. I was paying for brunch at the diner around the corner and the waitress noticed my hot pink wallet and said "You could sell those. I'd buy one." So I made her a leopard print one with a hot pink lining. She commented that it looked so neat and even, which is good because I have a habit of not dotting all my i's and crossing all my t's when it's for myself. I'll blame it on a background in theater, where things really only have to look good from the audience, not necessarily up close and in full light.

Today's project is the test run for a commission. We're calling it "The Man Clutch" but it's more of a wristlet, since it has a little wrist strap. The bag needs to hold, keys, cards, bulky phone and the detritus that accumulates over the course of a day. He decided on a denim exterior and a sail cloth lining, with card slots and a key clip. This is the one he found online, but it's a bit pricey. And it's not lined. And it has no interior detailing.

We settled on 4.5" x 8" x 2", which is just about the size I need to carry most of my daily detritus. At least when I don't have the kids with me. Because then I need room for snacks, water bottles and whatever plastic flotsam (thank you, Cake Wrecks) they pick up in the course of the day. So I made one for myself out of some lovely tan organic denim that's been rotting away in my stash for about 12 years.

It turned out to be relatively easy to make. I looked at Sew Sweetness' zipper-top bag for a bit of direction on how to attach the lining. No big zipper secrets other than to sew the fabric to the zipper one piece at a time. Since I wanted an exposed zipper, I didn't need to follow her instructions for that step.


It turned out that the hardest part was getting the card slots aligned and even. That waitress was right, it's the details that make things stand out, for better or for worse. It bothers me that the strap isn't centered on the zipper. I'll trim the interior seams more closely so things aren't as poofy in the inside. I'll leave a gap in the lining where it meets the ends of the zipper so it works more smoothly. And I'll let the zipper extend down the sides just a bit more, for easier access. But all in all, I think it turned out quite nicely for a first draft.

UPDATE 9/27/2012: It's holding up nicely. The interior "puffiness" has settled down as I've stuffed it to the gills several times over the last few months. This is now my go-to bag and my shoulders thank me for switching from a cross-body bag. It didn't help that it was a bit bigger, I carried a larger ladies' wallet instead of a duct tape billfold, and I kept it completely filled most of the time. One of these days I should wash it to clean up the handle, but other than that the stains are not showing.

Thursday, July 12, 2012

Week 28 or The Baguette Bag

I buy a lot of baguettes at our local bakery. They're delicious. They're fresh. They're the only thing my younger child will take for lunch.
Courtesy of A & J King Bakery, Salem
I've seen cloth bread bags on other blogs or webshops, but scoffed at them. I already teeter on the line between reasonable eco-consciousness and tree hugging granola freak, and that's only because I live in Massachusetts. If I were farther south, I'd be over the line already and too embarrassed to carry them. In any case, we don't have a breadbox, and most of our bread gets thrown in the freezer for storage beyond a day or two. The loaf breads, when you get them sliced, come in a plastic bag. So I freeze them in those. The baguettes, though, come in a plain white paper bag, which is useless for the freezer. I've been happily recycling the paper bags every week. Except that they're kind of a pain to fold up and stuff into the bin.

So there you have it. The real reason I will be carrying a cloth bag to the bakery next week is that I don't like folding long, skinny bags. As a side benefit, I get rid of an otherwise useless piece of fabric. And I save a tree over my lifetime. And I save some bleach from being used to whiten those bags. And I save the gas used to haul those bags to the recycling center. And to reprocess them. And to ship them back to where they will eventually be used again.

One of my pet peeves is people doing nothing about climate change because they don't believe the science. Forget the climate change part, there are plenty of other, completely unrelated reasons to reduce, reuse and recycle. Like mountain top removal coal mining. Or fracking. Or acid rain. Or resource depletion. Or the destruction of pristine habitats for the extraction of rare minerals. Or industrial accidents like Bhopal. Whatever your reasons are, start with the reduce, then go on to reuse and, as a last resort, recycle things you actually needed and used until they wore out.

This bag was made from material from a friend who was clearing out her house to prep it for sale, so she gave it to me. It's the same butterfly material that lined the teacher's bag a month ago. I'll use the bag until we stop buying baguettes on a regular basis, which might be the day I die, they are that good. Hopefully, when I am done with this bag, I will still be able to bring it to the city's fiber recycling day so it can be made into cotton paper or carpet backing or car soundproofing material or home insulation.


I started by cutting out a rectangle. Then I pinned the wrong sides together and sewed  along the long edge and one short end. Then I pressed the seams open, clipped the corner off, turned the bag inside out, and sewed the seams again. That's a French seam, which seemed appropriate for a bag for French bread. Plus it would keep me from getting stray bits of thread in the bread.

Then I sewed two button holes near the side seam and the fold, about 2 inches from the top of the bag. I turned the top edge down so the buttonholes were barely not folded inside the bag. And I sewed all the way around the bag,  just above and just below the buttonholes. Spelling out "Baguette Bag" using the over-the-top feature of my sewing machine that allows me to sew letters. Lastly I threaded two lengths of cord through the casing I'd just made, with one knot coming out of each buttonhole. VoilĂ , a Baguette Bag.