
 |
| Towel bar and 26"x37" fabric |
Once again, inspiration strikes from the materials on hand. We had a cheap towel bar that had fallen down one time too many. So I bought a new one and had to find something to do with the old one. The brackets got tossed and the bar got cut in two and became the handles for this bag.
 |
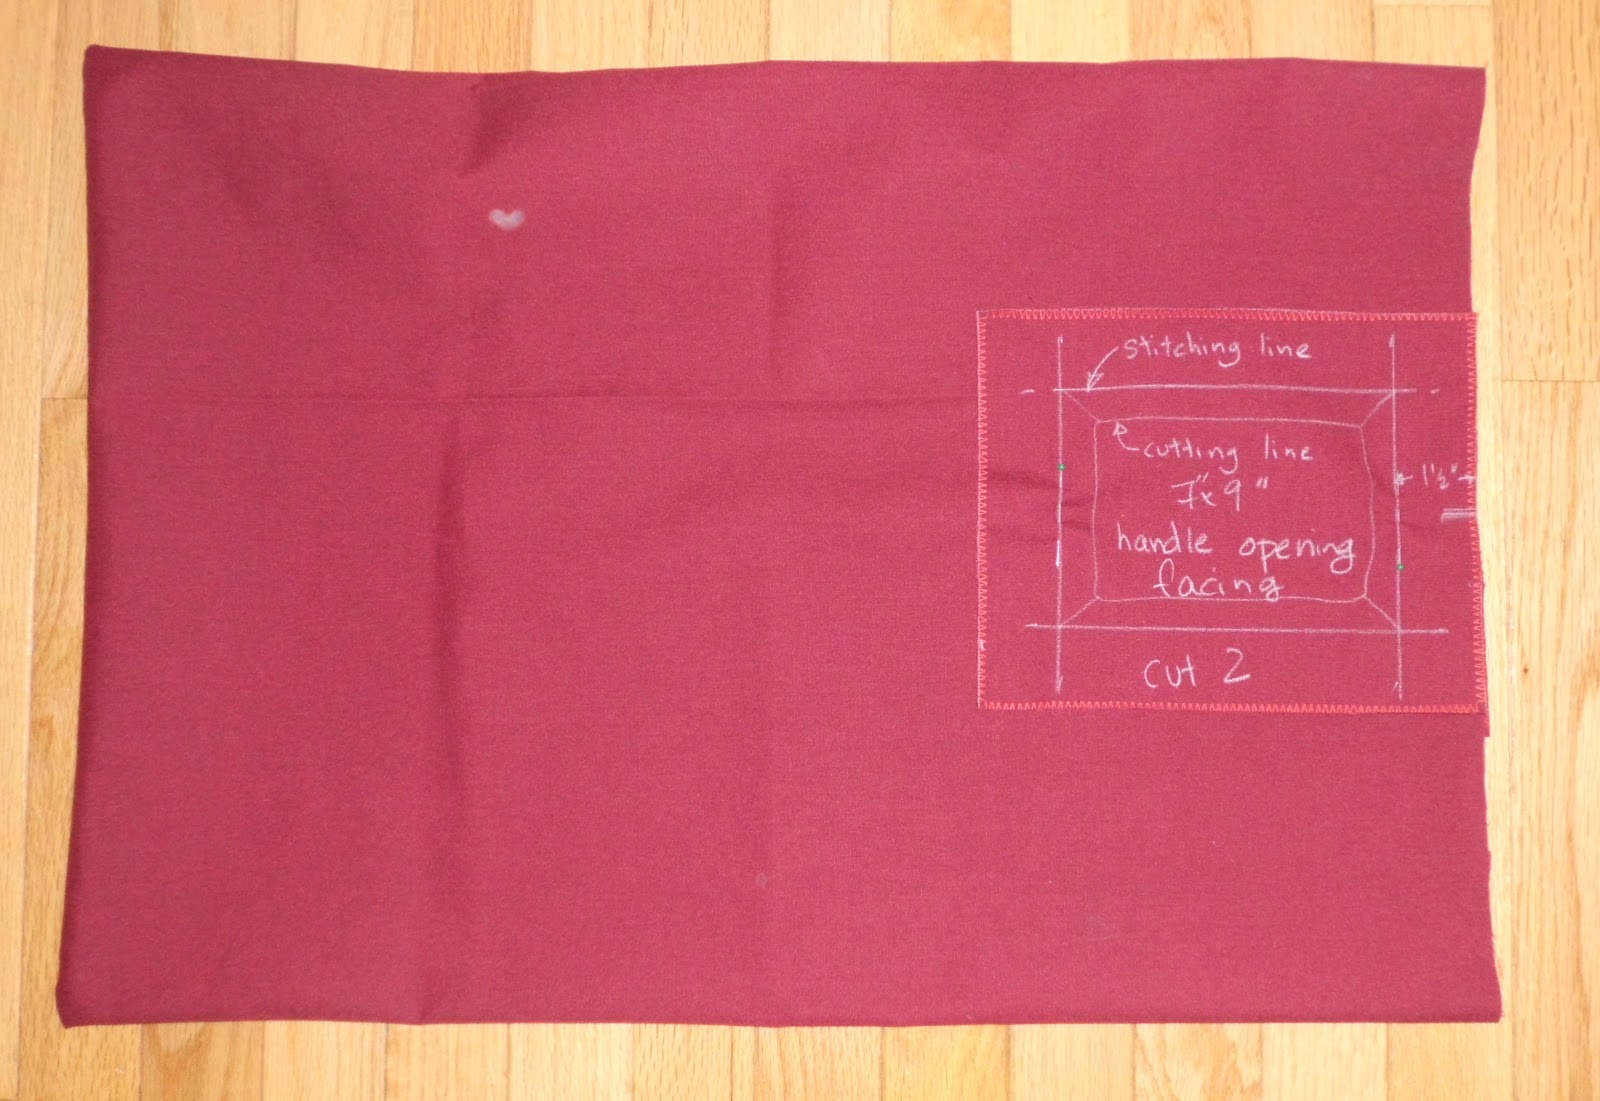
| Handle opening facings |
I aimed for a 12"x 6"x 18" tall bag. I cut one large rectangle, 26"x 37", and two small rectangles, 7"x 9", to face the handle opening. Once I actually put the bag together, I realized they should have been 9"x the width of the bag (12" in my case). The towel bar was about 19" long, so I cut it in half, getting two 9.5" pieces. My bar was wood, which made it easy to cut, but you could use a metal bar too. Or you could go crazy and buy a dowel. I do suggest looking around the house for something first, though. I've got my eye on the girls' Tinker Toys and sparkly magic wands. You might have a pointer, broom handle, wooden spoon... Just look.
Welcome back. What did you find?
 |
| Fold the body in two and stitch around 2 sides |
I figured I'd need a hole about 4" wide and 3" deep to fit my hand and the bar. Doubling the 3" to get 6", I drew a 4"x6" rectangle 1.5" from the edges of the facing. That gave me my stitching line. If your bar or hand is much larger or smaller, you may want to adjust that measurement. Since you'll be using a 9"x12" rectangle, draw the 4"x 6" one in the center of that, with the 4" end along the LONG edge. Put a little mark in the middle of the long edge so you can line it up with the middle of the bag body later. (I haven't done that yet, but you'll see the mark later.)
Now it's time to start sewing. Fold the large piece of material, the body of the bag, in half with the right (pretty) sides together. You'll have a 26"x 18.5" rectangle. Sew down the long edge and along the short edge to the fold. Zigzag along the raw edges to keep them from fraying.
 |
| Pin the facing to the center of the top edge |
Turn the bag right side out. Mark the midpoints of the open edges. Finish (zigzag stitch over) one long edge and the two short ends of the facing pieces. Pin the facing pieces to the open edges. Line up the unfinished edge of the facing with the upper edge of the bag, making sure the marks line up, too. All four marks should be in the same place so your handle openings will line up. Pin it all in place. Sew along the stitching line.
 |
| Cut the handle opening |
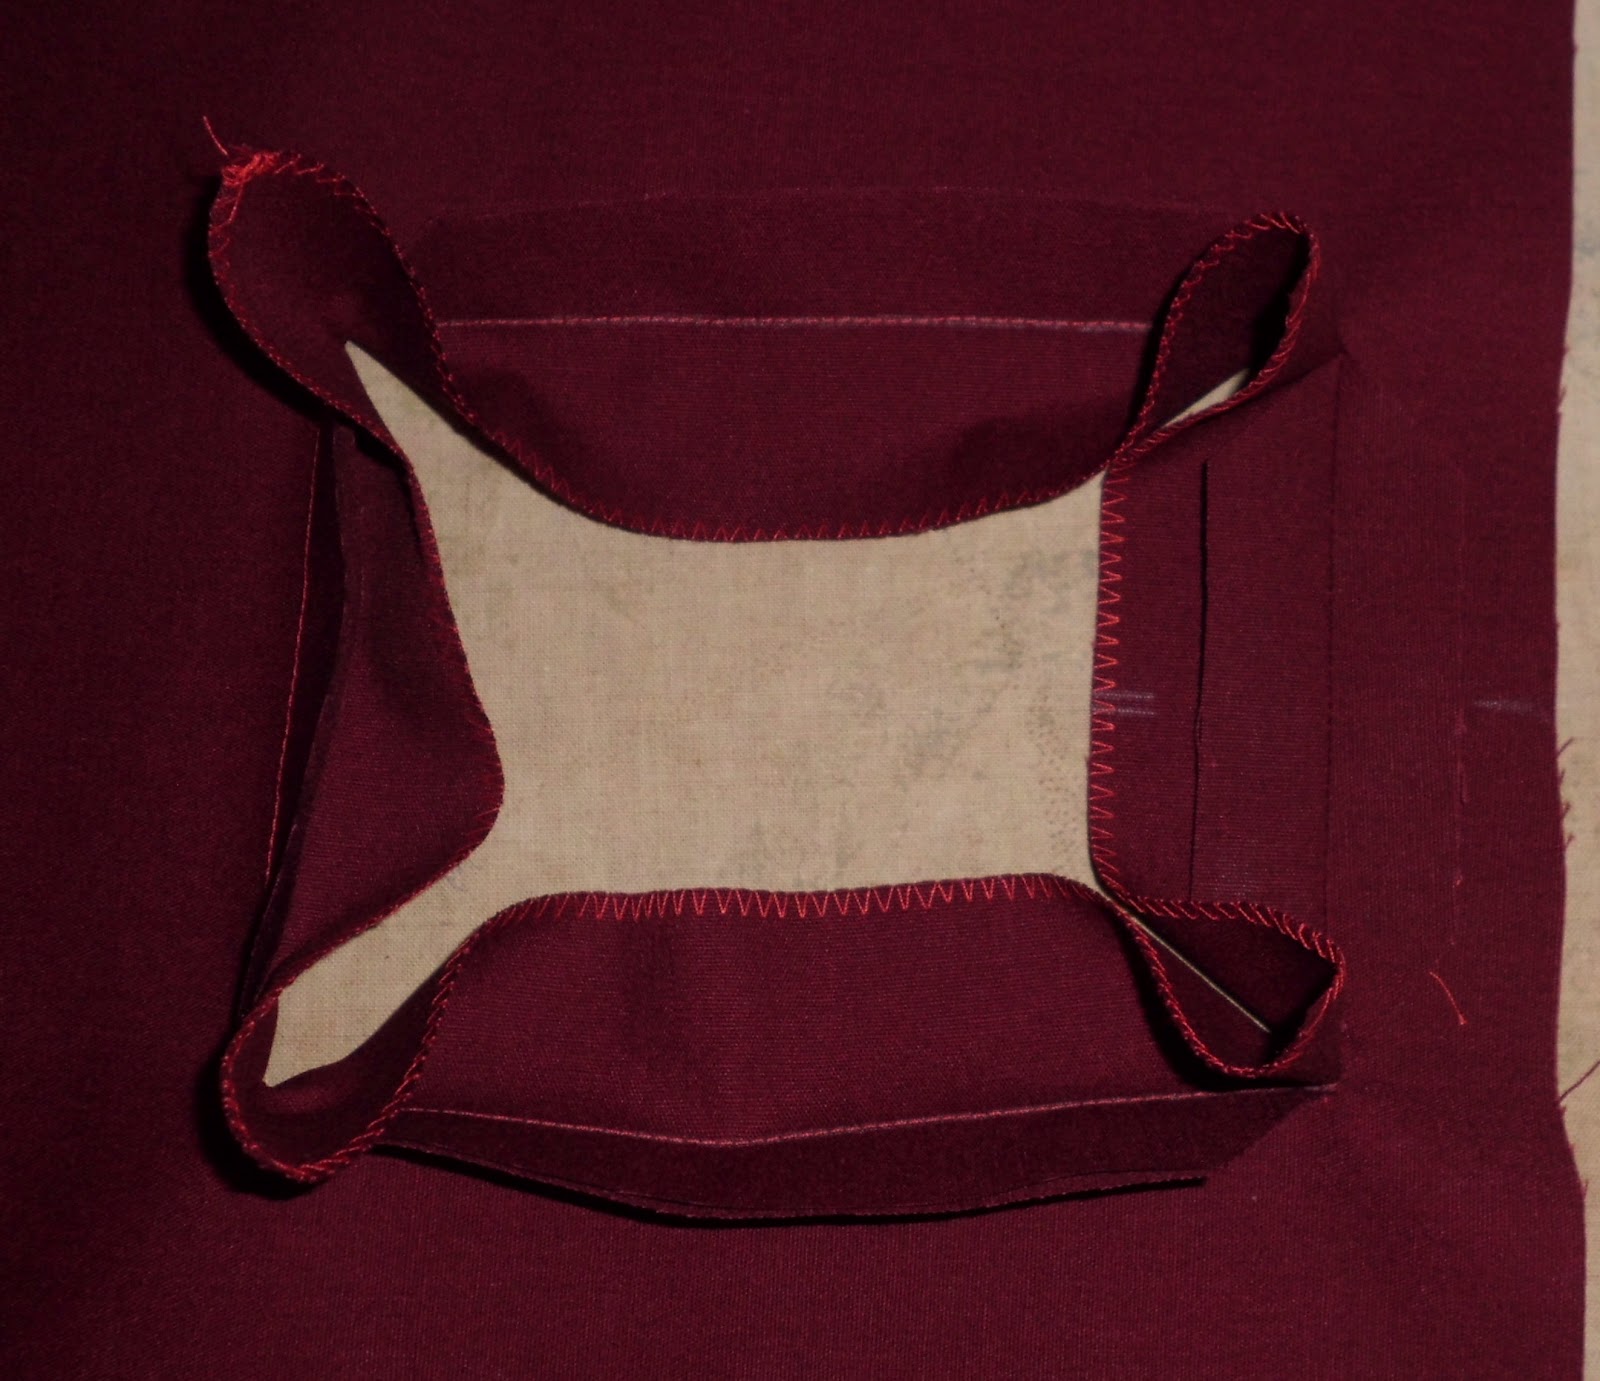 |
| Pull the facing through and press it |
Topstitch around the opening so it stays nice and neat forever and ever. That just means sew around the opening, really close, like 1/8"close, from the edge of the opening.
 |
| Topstitching |
 |
| Box corner |
Make the bottom box corners that will give your bag some dimension. I was aiming for 6", but I didn't measure and they ended up being a little bigger, making the faces of the bag a little under 12" wide. Whatever you do, make sure both sides are the same. Also make sure you line up your bottom seam with the side seam on one side and the side fold on the other. That way you'll know everything's square. See how nicely perpendicular the seams are in this picture?
 We're getting close to the end and every stitch from here on out will show on the outside. Fold the top edge of the bag towards the inside. Line up the two short edges of the handle opening and pin them together so nothing moves. Stick your handle in its' final position and pin around it. You want to stitch a channel that's exactly as wide as you need. Too small and you won't be able to get the handle back in. Too big and it will fall out when you go to pick up the bag. Take the handle out and sew where you've marked. Sew all the way from one opening to the next. Do this on both side of the opening. Then sew all the way around, on the level of the topstitching around the opening. That helps the facing keep from flapping open and falling out of the bag. Lastly, find the corners of the top of the bag. They should line up with the box corners you made at the bottom. With the handle removed, press those folds nice and crisply. Then sew right on them, from the top edge to the lower row of topstitching. That will help keep the handle from sliding out of position and dumping your carton of eggs on the sidewalk. It's not right up against the ends of the handles, so they can still be removed for washing (or repainting!). Insert the handles and go shopping!


